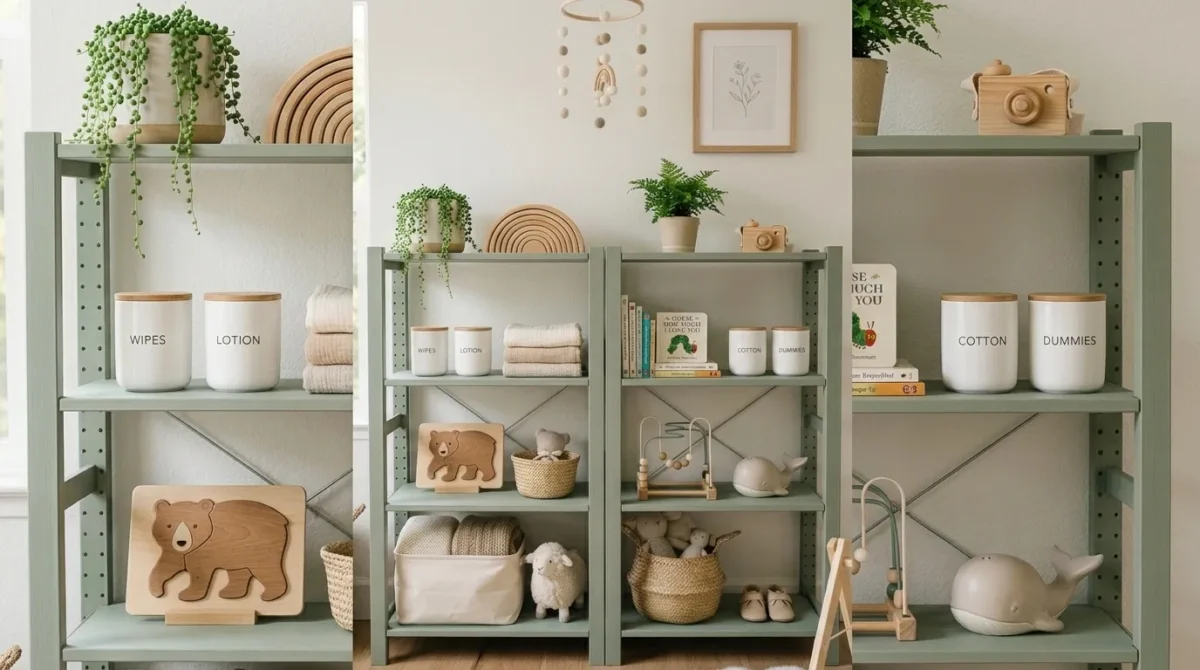
The IKEA IVAR shelf is an unfinished solid pine shelving system — adjustable, modular, and sold in component parts including uprights, shelves, cabinets, and side units — that serves as one of the most versatile DIY furniture canvases available in the residential market. This article gives you 12 genuinely creative, buildable IKEA IVAR shelf ideas that transform the system’s raw pine starting point into finished interior pieces that read as designed, considered, and significantly more expensive than their component cost suggests.
Most IKEA IVAR builds stop at assembly — they end at the point where the unfinished pine is standing in the room, useful but visually raw, functional but aesthetically unresolved. The homes in this list go further: they treat the IVAR system as a construction kit whose real value is realized only after a finish, a modification, or a compositional decision has been applied to the assembled structure. Here are 12 ideas worth saving — and building.
Why DIY IKEA IVAR Shelf Hacks Work So Well
The IKEA IVAR system occupies a unique position in the DIY furniture landscape because its design specification makes it unusually hackable compared to most flat-pack furniture. The system was originally designed for unfinished, utilitarian storage — the kind of shelving used in pantries, workshops, and storerooms where function completely overrides aesthetics. This utilitarian design intent produced, paradoxically, a system with extraordinary modification potential: the solid pine construction (not MDF or particleboard, but genuine solid pine throughout) accepts stain, paint, wax, and oil finishes with the same quality response as any purpose-built timber furniture; the adjustable shelf holes in the uprights allow height customization at 32mm intervals; the modular component system allows configurations from a single small shelf unit to a full wall of floor-to-ceiling cabinetry; and the affordable per-unit price makes the cost of experimentation negligible compared to custom furniture alternatives.
The IVAR system’s design history is relevant to understanding its hack potential. It was designed by IKEA in the early 1970s as a storage system for practical use in utility spaces, and its visual simplicity — the straight, undecorated solid pine uprights, the flat shelf boards, the simple cabinet door panels — reflects a Scandinavian design philosophy that values material honesty and functional clarity over decorative elaboration. This philosophy, which produced some of the 20th century’s most enduring design objects, also produced the IVAR’s specific characteristic: it looks unfinished because it is unfinished, and its unfinished quality is not a compromise but a design starting point. The IVAR is the blank canvas of the flat-pack furniture world.
The IKEA hack community has been transforming IVAR shelves since the early 2000s, with a dedicated community of DIY designers sharing modifications across platforms including IKEAhackers.net, Pinterest, and Instagram. The sophistication of the community’s output has grown substantially over the past decade — from simple paint finishes applied to assembled units to fully customized installations involving integrated lighting, custom door panels, upholstered backs, added hardware, and complete architectural integrations. The result is a category of DIY interior design work that produces results genuinely competitive with custom cabinetry at a fraction of the custom cost, with the IVAR system’s material quality providing the foundation that cheaper flat-pack systems cannot offer.
Style at a Glance
| Element | Detail |
|---|---|
| Philosophy | The IVAR is a canvas, not a finished product — its real design potential is realized only after a finish, modification, or compositional decision transforms the raw pine assembly |
| Key Modifications | Paint, stain, wax, oil finish, added hardware, integrated lighting, custom panels, fabric backing, architectural integration |
| Price Advantage | A fully hacked IVAR installation typically costs 20–40% of equivalent custom cabinetry while producing results visually competitive with pieces at twice or three times the IVAR system’s base cost |
12 DIY IKEA IVAR Shelf Ideas
1. Painted Black IVAR as a Moody Library Wall
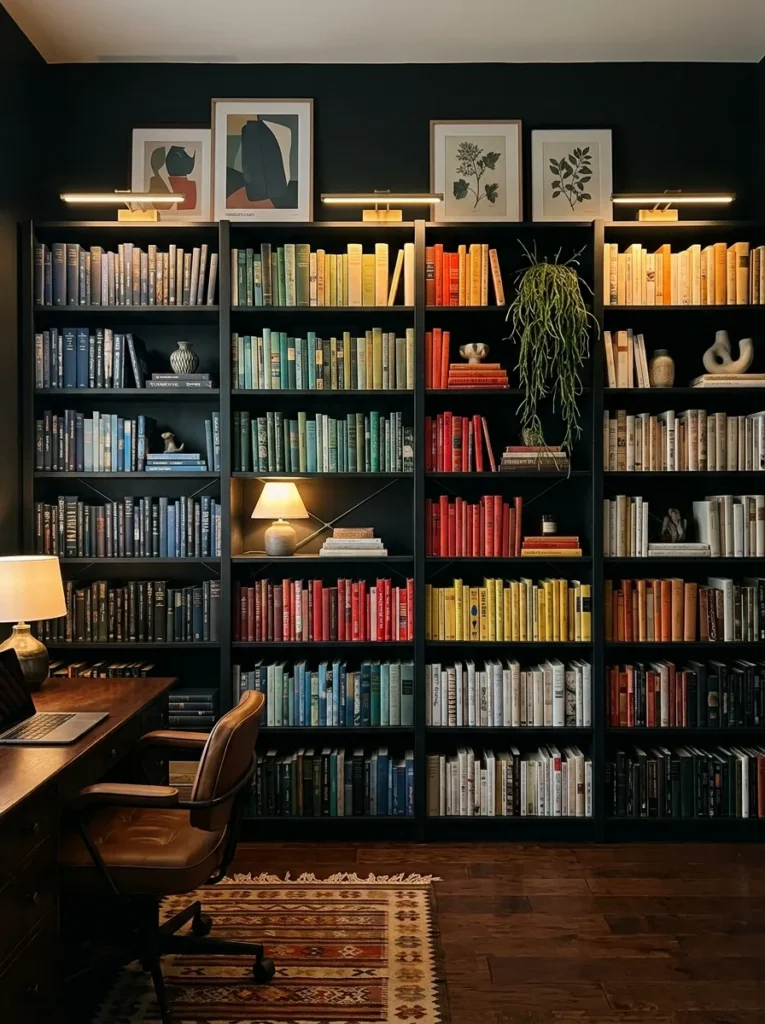
Vibe: Moody and considered — the home library wall that looks like it cost five times what it did and took five years to accumulate.
Why it works: Painting the IVAR system in deep matte black is the single hack that most dramatically transforms the system’s visual register — the raw pine’s utilitarian, warehouse-adjacent character completely disappears under a deep matte black finish, replaced by the dark, dramatic aesthetic of a high-end library or study. The matte finish is specifically the quality that reads as designed rather than decorated — a glossy black would read as painted furniture; a matte black reads as architectural material. The library wall application works because the deep dark color makes the books and objects displayed on the shelves appear more vivid and more considered by contrast — the dark background acts as a gallery wall behind the displayed objects, making every book spine and ceramic object read as a curated collection rather than stored items.
How to get it: Disassemble the IVAR units before painting rather than painting them assembled — painting the individual components separately produces a more even coverage at the shelf-to-upright junctions and the shelf hole grid. Apply a timber primer first (the pine’s natural resin can bleed through dark paint without a primer layer), then two coats of a quality matte black interior paint (Farrow & Ball’s Pitch Black No. 256, Benjamin Moore’s Black Beauty 2128-10, or Dulux Domino). Reassemble after painting. Install the units side by side and use a continuous strip of matching 10mm × 10mm black timber trim to cover any visible gaps between upright sections at the junctions — this trim detail makes the assembled units read as a continuous wall system rather than separate pieces placed together.
Quick Win: A can of matte black spray paint ($12–18) applied to IVAR cabinet door panels before fitting them to a standard IVAR unit produces door panels that read as custom matte black cabinet doors — the spray finish is more even than brush application on the flat door panel faces and achieves the high-quality matte surface that makes the hack look professional.
Shop the Look
| Product |
|---|
| IKEA IVAR shelf unit and uprights |
| Matte black interior paint |
| Timber primer undercoat |
| LED picture light warm |
| Black trim strip 10mm |
Also view: 14 Smart IKEA Furniture Ideas for Kids’ Rooms
2. Whitewashed IVAR with Linen Backing Panels
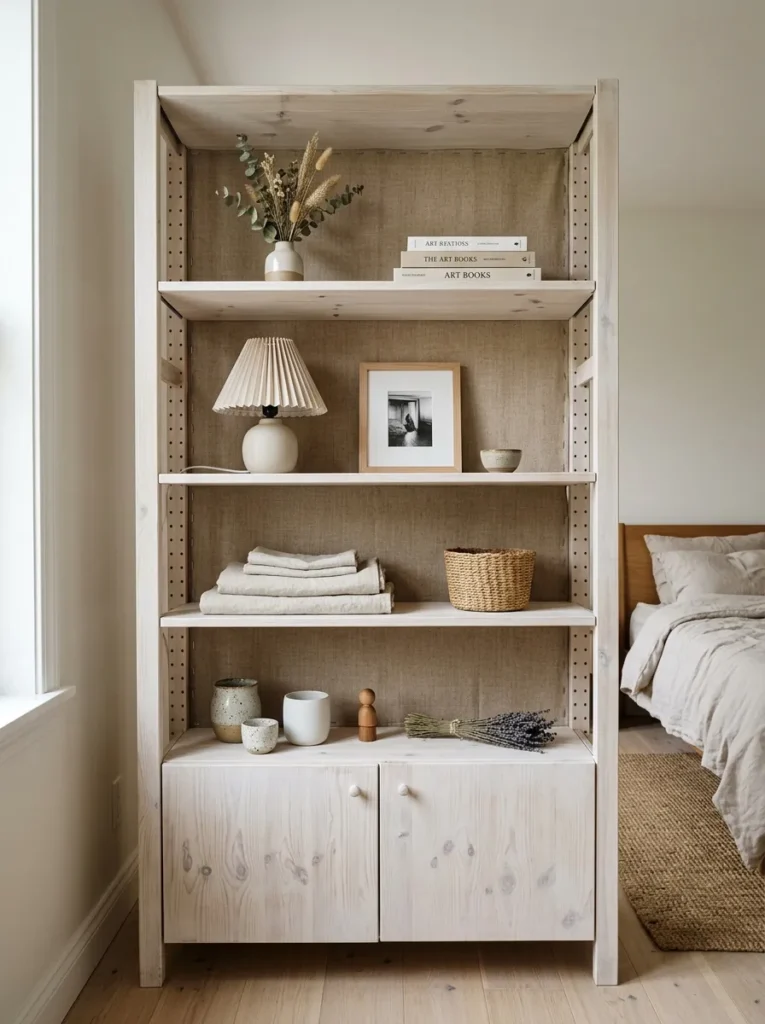
Vibe: Warm and Scandinavian — the shelf unit that looks like it arrived from a Copenhagen design shop rather than a flat-pack box.
Why it works: The whitewash finish on IVAR pine is the technique that most beautifully exploits the IVAR’s solid pine material quality — the diluted white paint settles into the grain’s recesses while sitting lightly on the raised grain surfaces, creating a surface that reads as simultaneously wood and white: the grain’s natural warmth visible through the white wash creates a softer, more organic surface than either raw pine or solid white paint. The linen backing panels added to the rear face of each shelf compartment are the finishing detail that transforms the whitewashed IVAR from a modified flat-pack unit into a designed interior piece — the natural linen textile creates a warm, tactile backdrop that makes every displayed object appear more considered, more deliberately placed, and more beautiful than the same objects displayed against the raw pine or the painted back of a standard shelf unit.
How to get it: Mix interior white paint with water at a 1:2 ratio (one part paint to two parts water) to create the whitewash solution. Apply to the raw pine IVAR components with a wide bristle brush, working in the grain direction, then wipe back immediately with a dry cloth before the wash dries — the wiping action removes the wash from the raised grain surfaces while leaving it in the grain recesses. Two wash applications produce the most visible and attractive grain result. For the linen backing panels, cut natural undyed linen to the exact internal dimensions of each IVAR shelf compartment and staple to the rear face of the IVAR upright using a staple gun, pulling the linen taut before stapling to prevent sagging.
Shop the Look
| Product |
|---|
| IKEA IVAR shelf unit double |
| White interior paint washable |
| Natural undyed linen fabric |
| Staple gun light duty |
| Ceramic decorative object set |
3. Walnut-Stained IVAR as a Mid-Century Media Unit
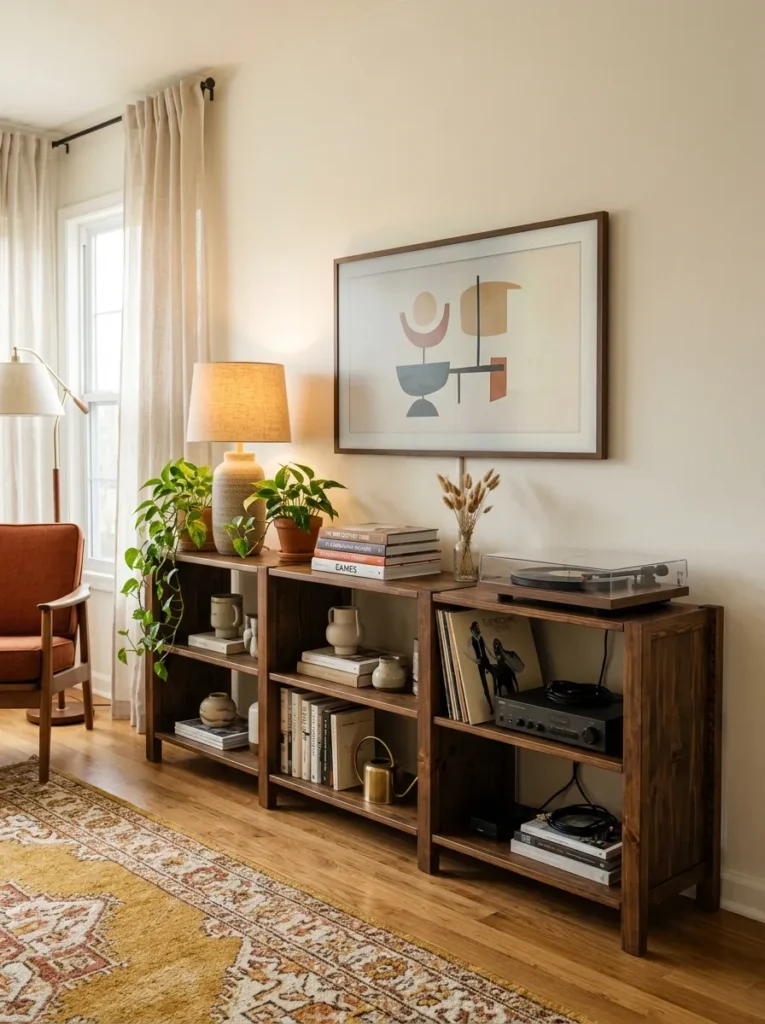
Vibe: Warm and mid-century — the media unit that makes streaming television feel like a design decision rather than a domestic concession.
Why it works: The IVAR system’s ability to be configured in a low, horizontal arrangement — by using the full range of upright heights and shelf depths available within the system — makes it uniquely suited to the mid-century sideboard configuration that is the most desirable media unit format in any living room with aspirations toward mid-century modern design. A low IVAR unit stained in a deep walnut tone reads as genuinely mid-century because solid pine stained with walnut oil or walnut gel stain absorbs the pigment into the grain in a way that replicates the natural color variation and warmth of genuine walnut wood at close inspection. The walnut stain on pine produces a result that is not identical to genuine walnut — the grain structure of pine is different from walnut, and the experienced eye can see the difference at close range — but from the normal viewing distance of a living room, the stained IVAR unit reads as a genuine solid wood sideboard of significant quality and cost.
How to get it: Apply a pre-stain timber conditioner to the raw pine before staining — pine’s natural porosity causes uneven stain absorption without conditioning, producing a blotchy result that reads as amateurishly finished rather than professionally stained. Apply a walnut gel stain (Minwax Dark Walnut or General Finishes Java Gel Stain are both widely available and produce authentic walnut color results) in thin, even coats using a foam applicator, wiping the excess before each coat dries. Two to three applications build to the deep walnut tone without obliterating the pine grain’s natural character. Finish with a matte or satin clear coat for durability.
Shop the Look
| Product |
|---|
| IKEA IVAR shelf uprights low height |
| Walnut gel stain dark |
| Pre-stain timber conditioner |
| Satin clear coat finish |
| Ceramic mid-century lamp |
4. IVAR Kitchen Pantry with Painted Doors and Brass Hardware
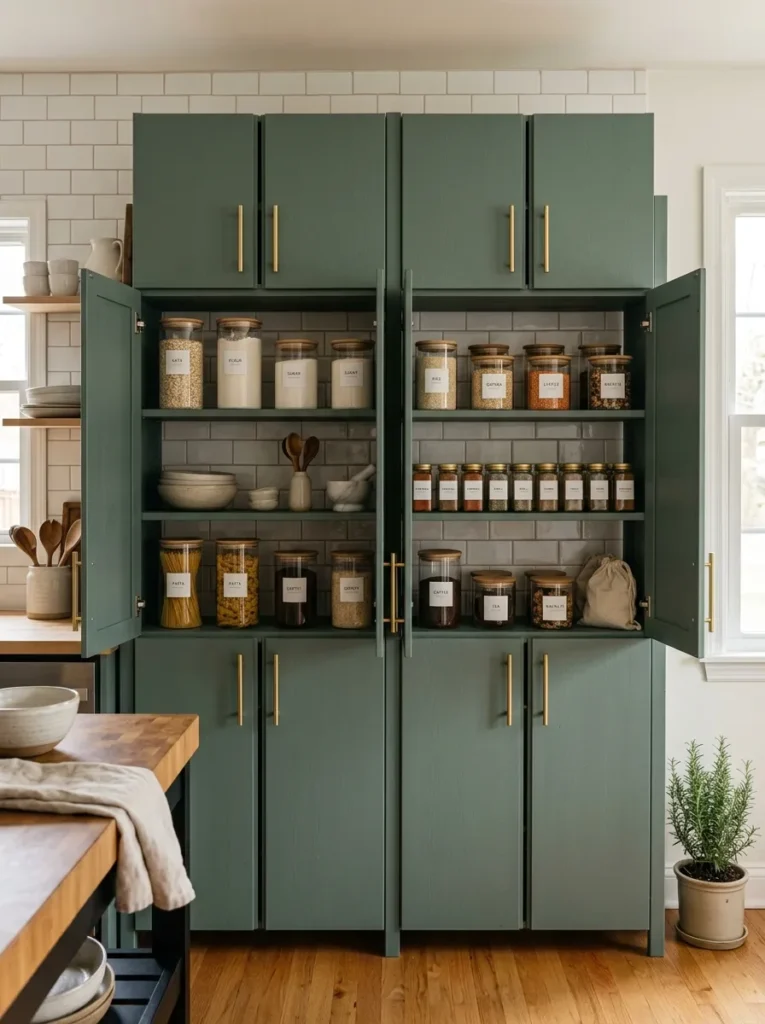
Vibe: Warm and organized — the kitchen pantry that makes food storage feel like a designed feature rather than a practical necessity.
Why it works: The IVAR cabinet unit with painted doors and replaced hardware is the hack that most immediately transforms the system from utilitarian storage into a designed kitchen feature — the combination of a saturated paint color on the door panels and quality brushed brass hardware completely changes the visual register of the unit from flat-pack to bespoke. The dusty sage green is the specific paint color that works best for this application because it reads as both kitchen-appropriate (its herb-garden reference connects naturally to the kitchen context) and design-forward (it is the color of the moment in contemporary kitchen design without being so trendy that it will date quickly). The brushed brass bar pulls are the hardware upgrade that delivers the highest perceived value improvement per dollar — a set of six bar pulls at $6–15 each costs $36–90 and transforms the unit’s perceived quality level from IKEA to artisan at a fraction of the cost of any alternative quality improvement.
How to get it: Remove the IVAR cabinet doors from the unit and paint them separately in the dusty sage green, applying three thin coats of an eggshell or satin paint (for kitchen durability) with a light sand between each coat. Drill new hardware holes in the correct position for the chosen bar pulls — most bar pulls use 96mm or 128mm center-to-center hole spacing, while IVAR’s standard hardware uses a different spacing, so new holes will need to be drilled. Fill the original hardware holes with wood filler before painting if they are in the wrong position for the new hardware. Rehang the painted doors and attach the new hardware for a kitchen pantry that reads as custom cabinetry.
Shop the Look
| Product |
|---|
| IKEA IVAR cabinet unit with doors |
| Dusty sage eggshell kitchen paint |
| Brushed brass bar pull 128mm |
| Wood filler |
| Labeled glass pantry jar set |
5. IVAR as a Bedroom Wardrobe with Fabric Curtain Closure
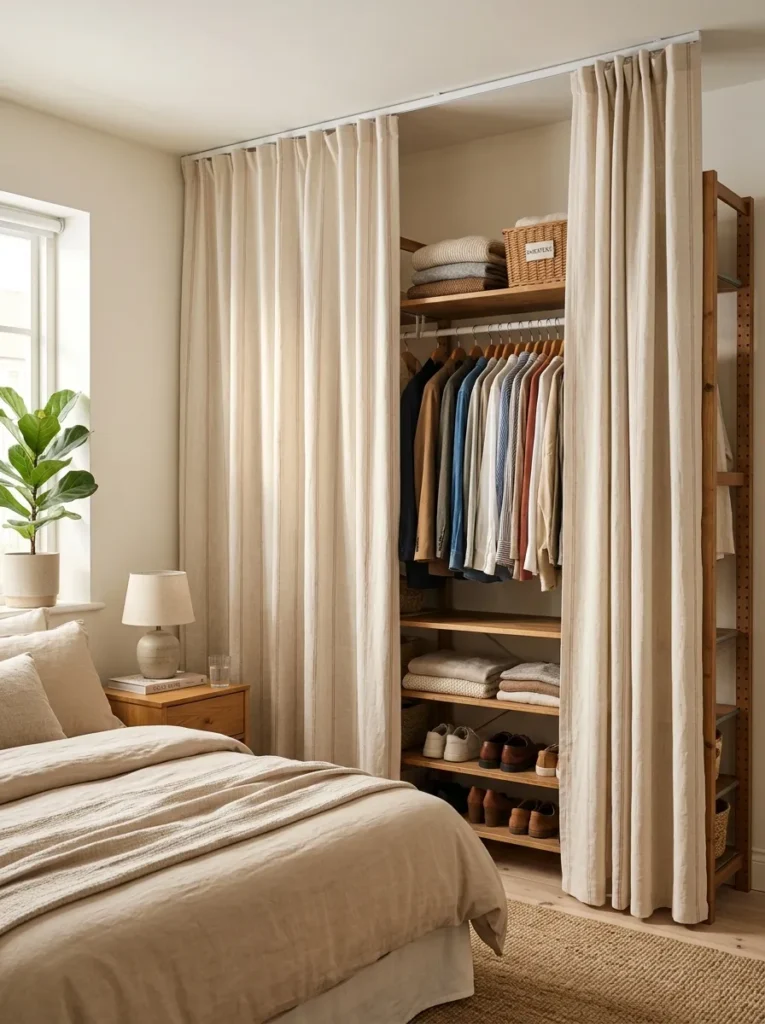
Vibe: Warm and resolved — the bedroom storage solution that reads as a considered design decision rather than a storage problem inadequately solved.
Why it works: The IVAR wardrobe with a linen curtain closure is the hack that most effectively solves the budget bedroom storage problem without resorting to either expensive custom wardrobes or visually overwhelming flat-pack wardrobe systems. The linen curtain closure is the design detail that elevates the IVAR from an open shelving unit to a wardrobe — it provides the visual concealment that a wardrobe function requires without the cost and visual weight of a full wardrobe system with doors. The curtain also introduces the soft textile quality that a bedroom specifically needs, adding warmth and texture to what would otherwise be a hard-surface storage element within the room’s softest, most textile-rich space. The ceiling-mounted curtain track (rather than a wall-mounted rod that would need to be positioned in front of the IVAR) allows the curtain to hang flush with the IVAR unit’s front face, creating the clean, wardrobe-like profile that makes the whole assembly read as intentional.
How to get it: Assemble two IVAR upright-and-shelf combinations side by side, adding a hanging rail (the IKEA IVAR hanging rail accessory or a standard 22mm timber dowel rod cut to width) at the correct hanging height within one or both sections. Install a ceiling-mounted curtain track (IKEA KVARTAL or a standard ceiling track system) across the full width of the assembled IVAR unit, positioned 50mm forward of the unit’s front face so the curtain can hang straight without catching on the shelf edges. The curtain fabric should be 1.5–2 times the track width to allow a full gather when the curtain is drawn.
Shop the Look
| Product |
|---|
| IKEA IVAR upright shelf set double |
| Ceiling curtain track system |
| Linen curtain panel ivory stripe |
| IVAR hanging rail |
| Curtain ring clip set |
6. IVAR as a Home Office Built-In with Integrated Desk
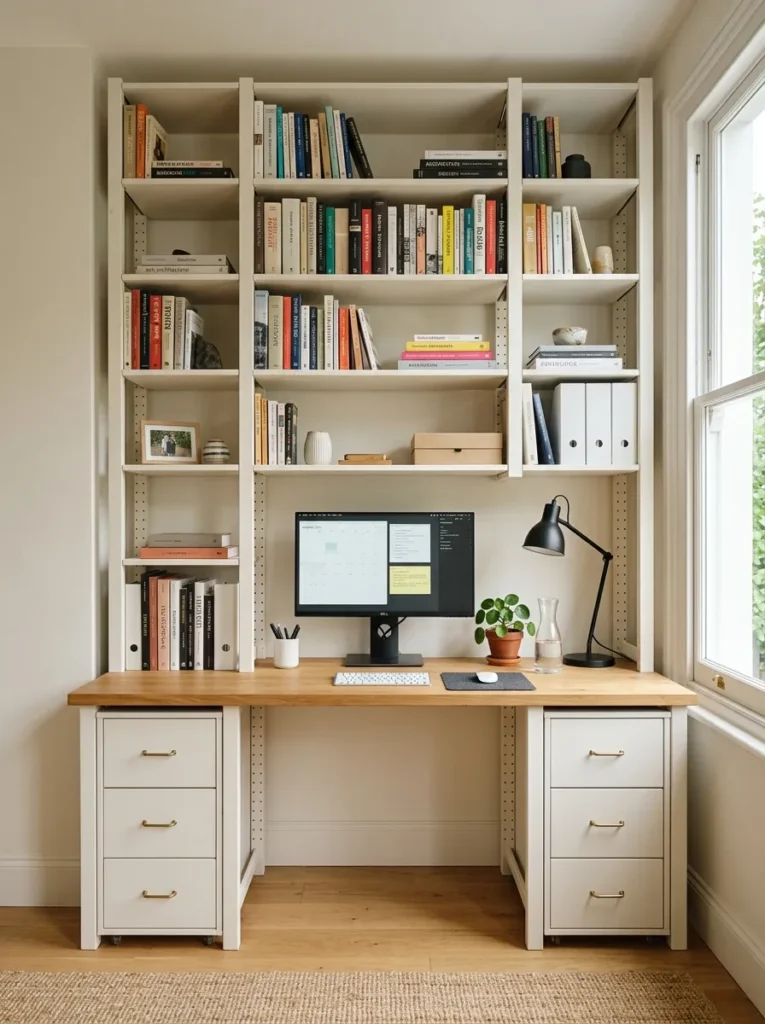
Vibe: Organized and considered — the home office that makes working from the bedroom or the corner feel like occupying a genuinely designed workspace.
Why it works: The IVAR home office built-in with integrated desk is the hack that most fully demonstrates the system’s potential as an architectural furniture element — by painting the IVAR units in the same color as the adjacent wall and integrating a solid timber desktop between two upright sections, the assembly reads as a designed built-in cabinetry system rather than assembled flat-pack shelving. The desk integration is the specific addition that makes the most functional difference: the IVAR system provides no horizontal working surface as a standard component, but the span of a 600mm-deep solid timber board (cut to the correct width and supported by the IVAR’s own shelf pin holes) between two uprights creates a desk surface that is structurally solid, visually integrated with the surrounding shelf system, and indistinguishable from a custom-built desk at normal room observation distances.
How to get it: Assemble two full-height IVAR upright sections flanking the center desk section. The desk surface board should be 600mm deep (the same depth as IVAR’s wider shelf configuration) and cut to the width of the center section. Install the desk surface board on IVAR shelf pins positioned at standard desk height (720–750mm from the floor). Paint the entire IVAR assembly and the adjacent wall in the same color — warm white, soft greige, or deep sage — in eggshell finish, applying paint carefully to the inner faces of the uprights as well as the external surfaces so that no raw pine is visible from the front or the sides.
Shop the Look
| Product |
|---|
| IKEA IVAR full height upright set |
| Solid timber desk board 600mm |
| Warm white eggshell paint |
| Adjustable desk lamp |
| Monitor stand timber |
7. Sage Green IVAR Nursery Shelves with Natural Wood Accents
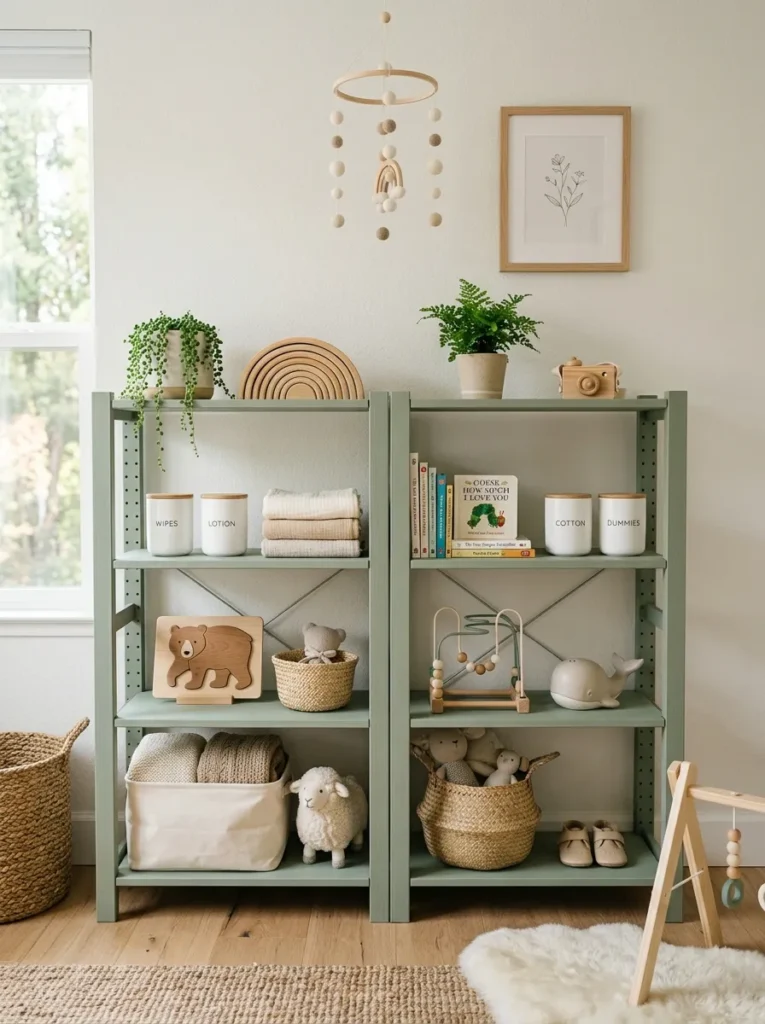
Vibe: Soft and considered — the nursery shelving that feels calm and safe before anything is placed on it.
Why it works: The sage green IVAR nursery shelf is the hack application that most sensitively applies a considered paint color to the IVAR system in a room context where color has the highest emotional significance — the nursery is the room where color quality (calm, warm, non-startling) has a direct relationship with the wellbeing of the room’s primary occupant. Soft sage green is the color that most broadly satisfies the nursery color requirements: it is calm without being clinical, warm without being stimulating, and naturally connected to the plant and garden world that is the most appropriate organic reference for a new child’s environment. The IVAR system’s solid pine construction is specifically appropriate for a nursery because it does not emit the volatile organic compounds (VOCs) associated with MDF and particleboard flat-pack systems — solid pine is a genuinely healthier nursery material than the manufactured alternatives at the same price point.
How to get it: Paint the IVAR components in a low-VOC or zero-VOC sage green interior paint (Farrow & Ball Mizzle No. 266, Benjamin Moore Saybrook Sage HC-114, or a custom-mixed zero-VOC equivalent) — the zero-VOC specification is specifically important in a nursery where off-gassing from paint can affect air quality. Allow the painted IVAR components to cure completely (minimum 7 days after the final coat) in a well-ventilated space before introducing the assembled unit to the nursery and before the child occupies the room.
Shop the Look
| Product |
|---|
| IKEA IVAR shelf unit double |
| Sage green low VOC interior paint |
| Natural wood toy set |
| White ceramic storage jar set |
| Natural muslin cloth folded |
8. IVAR Bedroom Headboard Wall with Integrated Nightstands
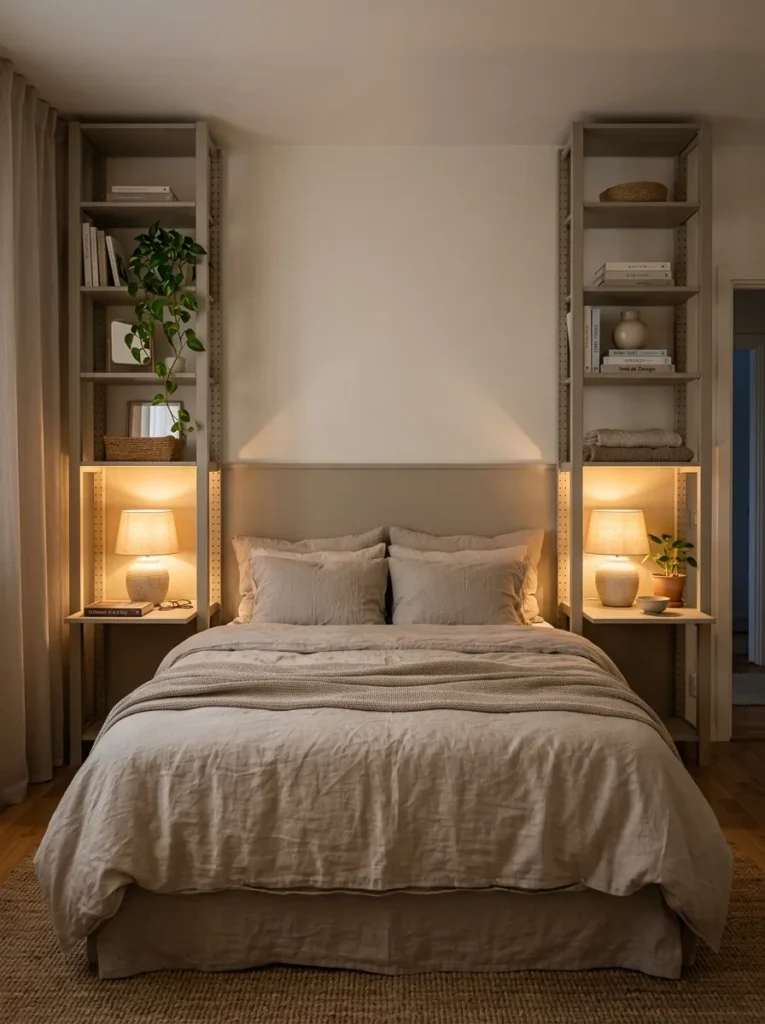
Vibe: Warm and resolved — the headboard feature that solves the bed wall, the nightstand, and the bedroom storage in a single designed gesture.
Why it works: The IVAR headboard wall configuration — full-height tower sections flanking a lower central section at headboard height — is the hack that most completely demonstrates the IVAR system’s modular potential by using the system’s own component variety (different upright heights, different shelf depths) to create a composed architectural feature that serves multiple functions simultaneously. The flanking tower sections provide floor-to-ceiling vertical storage on each side of the bed; the lower horizontal sections at nightstand height provide bedside surfaces and storage; and the implied horizontal boundary at headboard height creates the visual frame around the bed that a designed headboard provides. Painted in a single uniform greige throughout, the entire assembly reads as a continuous designed feature rather than assembled components — the color continuity across the varied sections of the system creates the visual unity that makes the composition read as a single designed piece.
How to get it: Plan the configuration on paper before purchasing IVAR components — sketch the full headboard wall with exact measurements for the bed width, the flanking tower widths, and the target headboard height. The flanking tower sections should be one upright width (40cm or 50cm standard IVAR upright options) on each side, with the total configured width extending 300–500mm beyond the bed width on each side to create a generous visual frame around the bed. Paint all components in a single warm greige before assembly.
Shop the Look
| Product |
|---|
| IKEA IVAR upright tall pair |
| IKEA IVAR upright medium pair |
| IVAR shelf board set |
| Warm greige interior paint |
| Ceramic bedside lamp pair |
9. Terracotta-Painted IVAR as a Boho Living Room Display
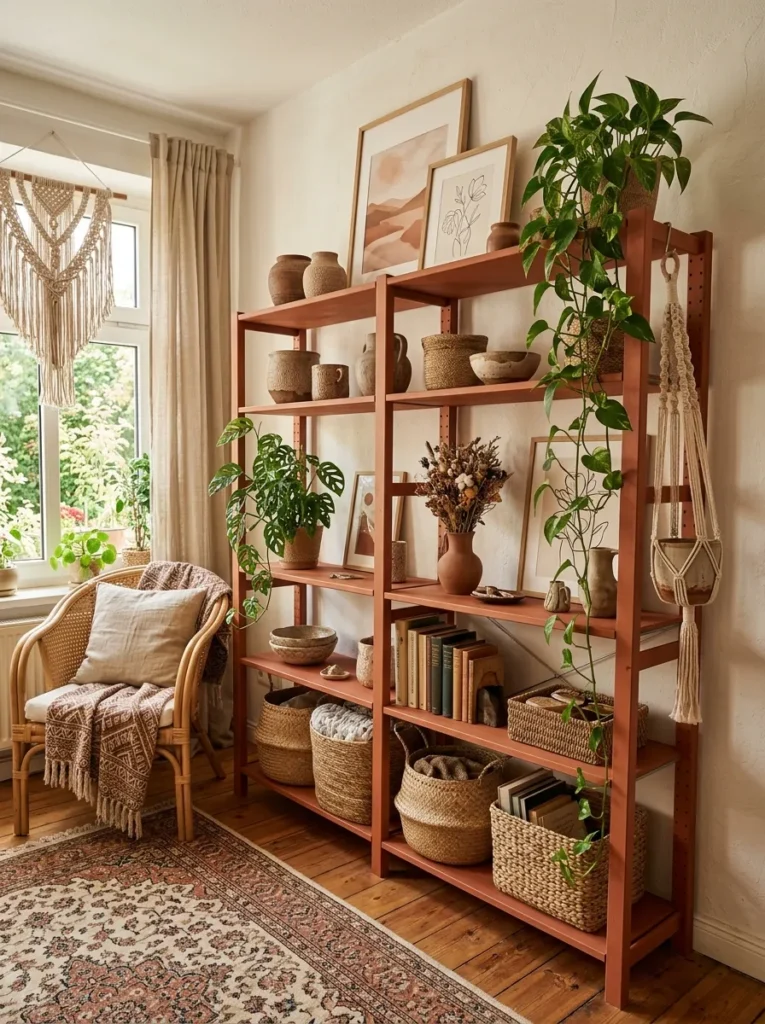
Vibe: Warm and bohemian — the living room shelf that makes the whole room feel like it was curated by someone who has spent time in Morocco and Oaxaca and decided to stay home.
Why it works: Terracotta is the paint color that most naturally and most powerfully connects the IVAR’s solid pine material to the warm, earthy, organic material palette of the bohemian interior — the clay-red tone of genuine terracotta references the same mineral world as the terracotta pots, the woven baskets, the ceramic vessels, and the macrame fiber objects that populate the bohemian shelf, creating a color coherence between the shelf unit and its contents that makes the entire display read as a single designed composition. Pine’s natural grain, visible through a single coat of terracotta paint applied at low dilution (slightly thinned to allow the grain to remain visible beneath the pigment), adds a surface warmth and organic variation that a synthetic material could not produce under the same paint color.
How to get it: Apply terracotta paint (Farrow & Ball’s Red Earth No. 64, Benjamin Moore’s Terra Cotta Tile 2090-30, or a custom-mixed clay-mineral terracotta) in a single thin coat slightly thinned with 10% water to allow the pine grain to read through the paint layer. A single thin coat rather than the standard two full coats is specifically the technique that produces the semi-opaque, grain-visible result that reads as genuinely craft-made — two full opaque coats on IVAR produces a result identical to any painted flat-pack furniture, while the single-thin-coat technique produces a result specific to genuine solid timber painted with intention.
Shop the Look
| Product |
|---|
| IKEA IVAR shelf unit single |
| Terracotta interior paint |
| Macrame wall hanging |
| Ceramic vessel collection |
| Trailing pothos plant |
10. IVAR Floor-to-Ceiling Room Divider in an Open-Plan Space
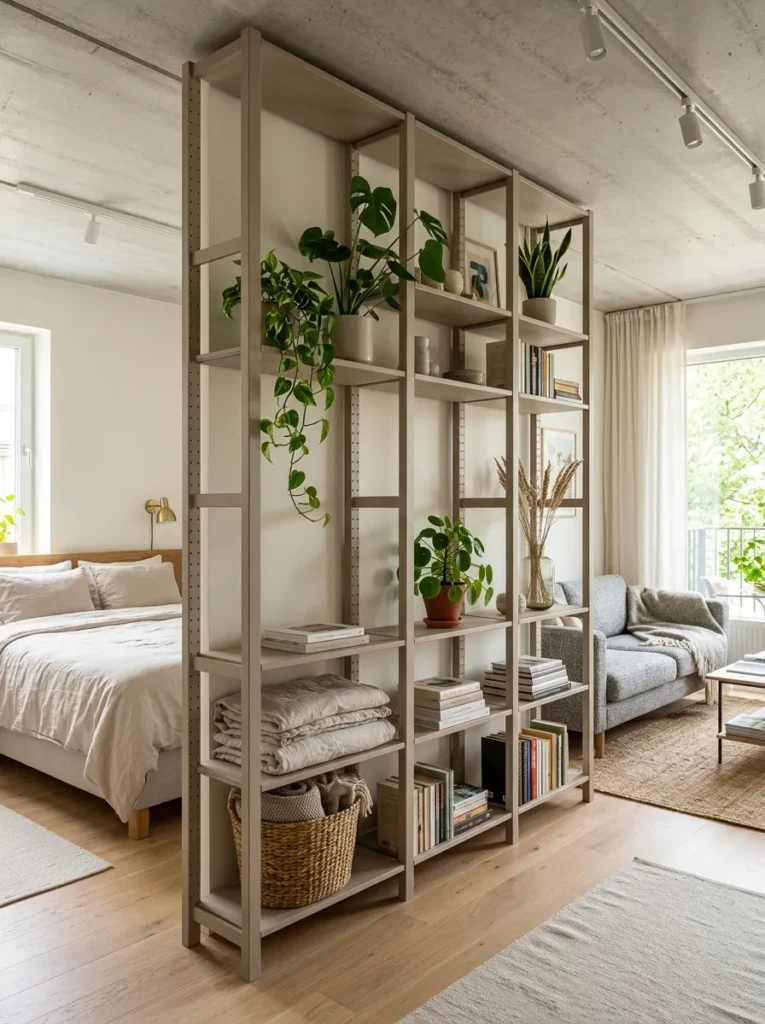
Vibe: Open and resolved — the room divider that creates two rooms from one without closing either one.
Why it works: The IVAR system deployed as a floor-to-ceiling room divider in an open-plan apartment is the hack that most powerfully demonstrates the system’s architectural (rather than merely furniture) potential. The IVAR’s open structure — shelves accessible from both faces of the assembled divider — creates a spatial boundary that is simultaneously solid enough to define separate zones and transparent enough to maintain the open, light-filled quality of the open-plan apartment. This open-shelf divider function is specifically different from a wall or a curtain: where a wall creates opaque separation and a curtain creates flimsy, impermanent separation, the open-shelf room divider creates a defined, articulated spatial boundary that visually separates zones while allowing light, air, and partial visual connection to flow between them. The floor-to-ceiling height of the assembled IVAR sections is the specification that makes the divider read as architectural — a unit that falls short of the ceiling reads as furniture placed in a room; one that extends to the ceiling reads as a spatial element that defines the room.
How to get it: Assemble multiple IVAR upright sections side by side perpendicular to the floor plan’s main walls, anchoring each upright section to the floor and ceiling for structural stability — at full height, an unsecured IVAR room divider is a tipping hazard that requires both floor and ceiling fixing. Use IKEA’s own fixing hardware (IVAR ceiling and floor fixings are available as accessories) or custom-fabricated metal plates to secure the units top and bottom. Paint before assembly for the most even finish.
Shop the Look
| Product |
|---|
| IKEA IVAR upright tall set |
| IVAR ceiling and floor fixing set |
| Warm greige architectural paint |
| Plant collection both faces |
| IVAR shelf board multi pack |
11. Limewashed IVAR with Aged Brass Hardware
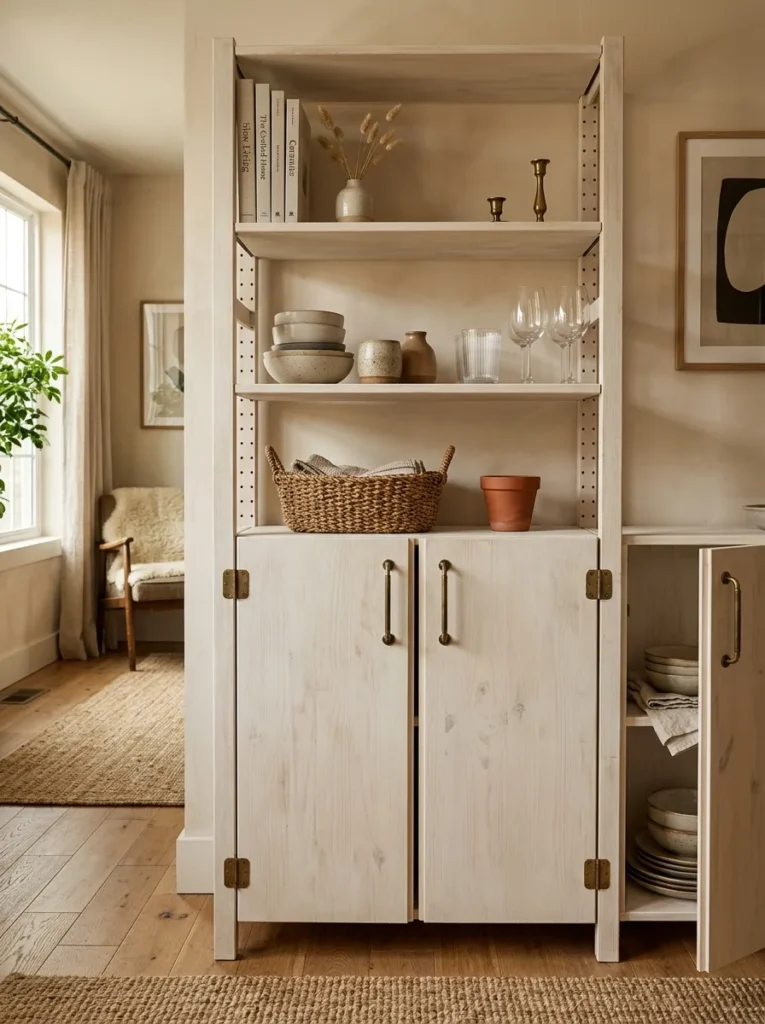
Vibe: Warm and artisanal — the cabinet piece that makes guests ask which antique dealer you found it at.
Why it works: The limewash technique applied to IVAR pine is the hack that most completely transforms the visual material character of the system — from manufactured flat-pack to genuinely artisanal object — because limewash is a specifically aged, historic finish that references the calcium carbonate-based wall finishes of Mediterranean, French, and Italian vernacular architecture, and its application to solid timber produces a surface that references genuinely old furniture rather than a painted contemporary piece. The pine grain’s natural variation causes the limewash to absorb unevenly across the surface, creating the characteristic color and texture variation of the limewash finish that makes it read as material depth rather than surface application. The aged brass hardware is the specific hardware choice that most authentically completes the aged, artisanal reading of the limewashed finish — new chrome or brushed nickel hardware would conflict with the historic character that the limewash establishes, while aged brass hardware reinforces it.
How to get it: Apply a diluted limewash paint (Romabio Classico Limewash, Portola Paints Roman Clay, or a DIY solution of chalk paint diluted 1:1 with water) to the raw pine IVAR components using a wide natural bristle brush. Apply in crossing directions (horizontal and vertical strokes alternated) and leave partially wiped — the wiping removes the limewash from the raised grain surfaces while leaving it in the recesses, creating the characteristic depth and variation of a genuine limewash finish. Allow to dry fully between coats and apply two to three coats for the depth of color variation that reads as genuinely aged.
Shop the Look
| Product |
|---|
| IKEA IVAR cabinet unit |
| Romabio limewash paint |
| Aged brass hinge set |
| Aged brass bar pull set |
| Natural bristle wide brush |
12. IVAR as a Styled Entryway Bench and Storage Unit
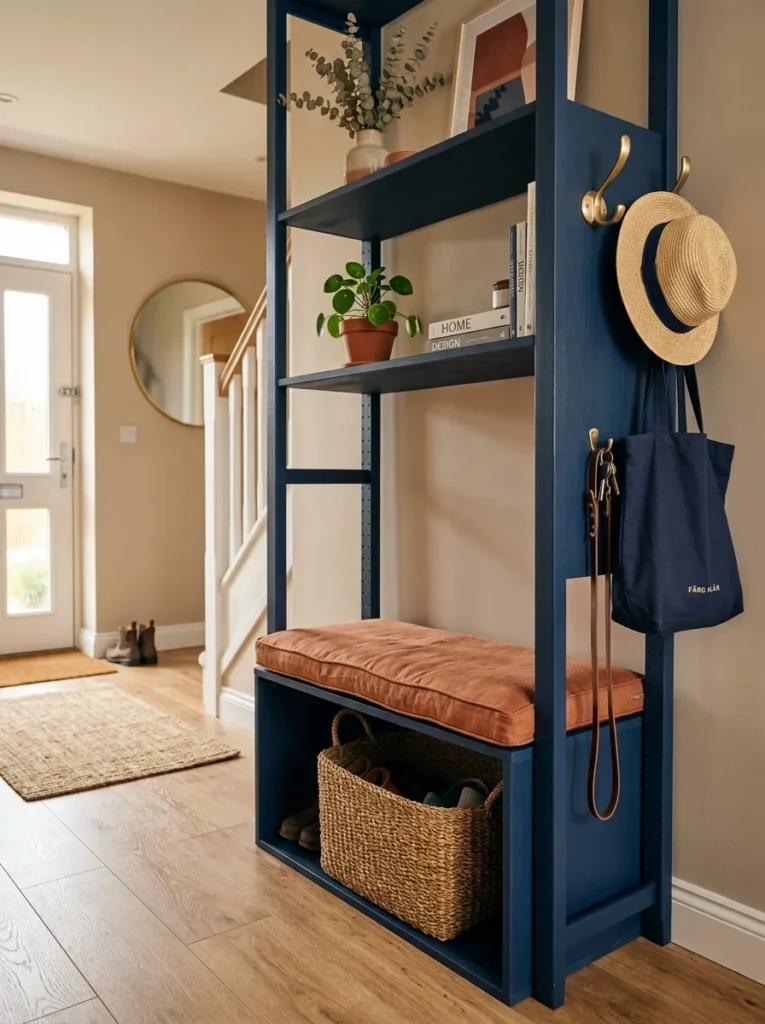
Vibe: Warm and organized — the entry hall station that makes arriving home feel like arriving somewhere designed to receive you.
Why it works: The IVAR entryway bench and storage unit is the hack that most practically transforms the IVAR system into a purpose-specific piece of entry hall furniture — entry hall furniture being, in the residential interior, the category most consistently purchased expensively or improvised badly because the specific combination of seating, storage, hook provision, and visual quality that a well-designed entry station requires is rarely available off-the-shelf at a reasonable price. The IVAR system’s modular construction allows a configuration that provides all four functions simultaneously: the lower open compartment at floor level receives baskets for shoes and accessories; the bench surface at 450mm height provides seating for putting on shoes; the upper shelves above the bench provide display surface for keys, plants, and decorative objects; and added brass hooks on the upright side faces provide coat and bag hanging. The deep navy paint makes this functional configuration read as a considered piece of entry furniture rather than adapted shelving.
How to get it: Configure a standard IVAR upright with shelves positioned at floor level (for baskets) and at 450mm (for the bench surface), leaving the space between these two shelves as an open compartment. The bench surface requires a seat cushion to read as a genuine bench rather than an IVAR shelf — a custom-cut foam cushion (50mm high-density foam cut to the shelf dimensions and covered in a linen fabric) placed on the shelf surface completes the bench function. Install brushed brass wall hooks (not IKEA hooks but quality hardware-store hooks) directly into the IVAR upright’s pre-drilled holes using the correct screw size.
Shop the Look
| Product |
|---|
| IKEA IVAR upright and shelf set |
| Deep navy interior paint |
| Brushed brass wall hook set |
| Foam cushion cut to size |
| Terracotta linen fabric |
How to Start Your IVAR Hack
Your single first move is to plan the configuration on paper before purchasing any IVAR components — and to measure the specific wall or space the IVAR system will occupy with the precision that a built-in furniture installation requires rather than the approximate measurement that a furniture purchase usually demands. IVAR’s modular system allows configurations from 30cm wide to wall-to-wall, from 50cm tall to ceiling height, and from 20cm deep to 50cm deep depending on the shelf option chosen — but every one of these variables has consequences for how many components are required and how the assembled unit will relate to the specific architectural context. A full-wall IVAR installation that is 10mm too wide for its space, or 50mm too short for a ceiling clearance that is specific to your room, cannot be corrected after purchase without returning components.
The most common IVAR hack mistake is underinvesting in the finishing preparation and overinvesting in the paint color decision. The single most important determinant of how professional the finished IVAR hack looks is not the paint color but the surface preparation before the first coat of paint is applied — and the surface preparation for solid pine has specific requirements that many first-time hackers skip. Pine contains natural resins that can bleed through paint, particularly dark and saturated colors, producing yellow or orange patches that become visible through the painted surface over time. A quality shellac-based primer or a stain-blocking primer (Zinsser BIN or Zinsser Bulls Eye 1-2-3) applied before the first paint coat prevents resin bleed and provides the stable base that allows the topcoat to achieve its intended color without patches or variation. This primer step adds $15–25 to the material cost and 2–4 hours to the total build time, and the difference it makes in the finished result is disproportionately large relative to the investment.
Three specific material investments under $50 that create immediate IVAR hack quality: (1) A quality natural bristle brush ($12–20 from a paint supply store) produces a significantly more even paint application on solid pine than a standard foam roller, which catches on the grain and produces a stippled texture rather than a smooth, even surface — the natural bristle brush lays paint into the grain in a way that reads as professionally applied. (2) A set of six quality replacement hardware pieces in brushed brass or aged bronze ($24–45 for six pieces from a hardware store) immediately transforms the perceived quality of any IVAR cabinet unit by replacing the generic IVAR hinges and pulls with hardware that reads as selected and designed rather than included. (3) A roll of timber edge banding in a matching finish ($8–15 from a hardware store) applied to any exposed shelf edges that are cut during configuration modification creates a finished edge quality on the cut section that matches the uncut edges, preventing the raw-sawn-pine appearance that undermines an otherwise well-executed hack.
Realistically, a complete single IVAR unit hack — one standard IVAR shelf unit with painting, hardware replacement, and finish application — costs $80–180 in IVAR components and $40–80 in materials (primer, paint, hardware, brushes), taking one weekend including drying time between coats. A full wall IVAR installation — multiple units assembled floor-to-ceiling across a full wall — costs $400–900 in IVAR components and $80–150 in materials, taking one weekend of assembly and one weekend of painting (with drying time in between), producing a result that reads as custom cabinetry worth $2,000–6,000 at typical custom furniture pricing. The most impactful single-weekend IVAR project for a first-time hacker is the painted IVAR pantry with replaced hardware (Idea 4) — it produces the most dramatically improved result relative to the starting condition of a standard IVAR unit, demonstrating the hack’s full potential in a single achievable weekend project.
Frequently Asked Questions About DIY IKEA IVAR Shelf Hacks
What paint works best on IKEA IVAR pine shelving?
The best paint for IKEA IVAR pine shelving is a quality interior paint in an eggshell or satin finish applied over a shellac-based stain-blocking primer. The primer is more important than the topcoat choice — without stain-blocking primer on raw pine, the natural resin in the timber bleeds through most paints within weeks of application, producing yellow or orange patches that become visible through the painted surface. After priming, any quality interior paint in the correct finish works well on the solid pine surface. For dark colors (black, navy, deep sage), two to three topcoats are typically required for full coverage. For light colors, one to two coats over primer is generally sufficient. Chalk paint (Annie Sloan Chalk Paint, Rust-Oleum Chalked) is a popular choice for IVAR hacks because it adheres to raw pine without a separate primer and dries to a beautifully matte, slightly chalky surface — though it requires a wax or varnish topcoat to protect the soft chalk surface from marking.
How do I make an IKEA IVAR hack look custom and not flat-pack?
The three decisions that most consistently make an IVAR hack read as custom rather than flat-pack are: a quality paint finish applied with careful surface preparation (primer, sanding between coats, and a quality topcoat that covers evenly and hides the assembly joints between components); replacement hardware in a quality finish (brushed brass, aged bronze, or matte black hardware from a specialist hardware supplier rather than the standard IKEA hardware or big-box hardware store alternatives); and trim details that conceal the assembly gaps between adjacent IVAR upright sections (a continuous strip of 10mm × 10mm timber trim in a matching paint color applied at every upright-to-upright junction covers the visible gap that reveals the modular assembly and creates the visual continuity of a custom-built piece). These three elements — paint quality, hardware quality, and junction trim — are together responsible for approximately 80% of the perceived quality difference between an IVAR hack that looks DIY and one that reads as custom.
Can the IKEA IVAR be used as a built-in and how?
Yes — the IVAR system can be installed as a built-in by fixing the upright sections to the wall at the rear face (using L-brackets or dedicated IVAR wall fixing brackets) and to the ceiling at the top (using IVAR ceiling fixing accessories or custom fabricated steel plates). A built-in IVAR installation that is painted the same color as the adjacent walls reads as genuinely architectural — the color continuity between the unit and the wall behind it creates the visual impression of a single surface rather than furniture placed against a wall. Adding a ceiling cornice (a small length of standard timber cornice molding glued to the gap between the top of the IVAR upright and the ceiling) conceals any gap at the ceiling junction and creates the finishing detail that distinguishes a built-in from a tall freestanding shelf unit.
Is it worth hacking IKEA IVAR compared to buying ready-made furniture?
The cost-versus-result calculation for IVAR hacking consistently favors the hack approach for anyone with basic DIY skills and the time to invest in a two-weekend project. A fully hacked IVAR installation — painted, fitted with quality hardware, and styled — costs 20–40% of the equivalent custom cabinetry cost while producing visual results competitive with pieces at twice or three times the IVAR system’s base price. The specific categories where IVAR hacking produces the most compelling results are: built-in library walls (where custom cabinetry costs $5,000–20,000 and an IVAR hack achieves approximately 80% of the visual quality at 15–25% of the cost), kitchen pantry cabinets (where freestanding custom pantry cabinetry costs $1,500–4,000 and an IVAR hack achieves comparable results at $300–700), and bedroom wardrobe systems (where custom wardrobe systems cost $3,000–12,000 and a hacked IVAR wardrobe with curtain closure achieves the functional and visual requirement at $400–900).
What are the best IVAR configurations for small apartments?
The most spatially efficient IVAR configurations for small apartments are those that maximize the vertical dimension — floor-to-ceiling IVAR installations use the full volume of the room without consuming additional floor area beyond the unit’s footprint. The four highest-value IVAR configurations for small apartments are: the full-height room divider (creating two functional zones from a single open space without walls), the bedroom headboard wall with integrated nightstands (solving the bed wall, nightstand, and bedroom storage in a single footprint), the fold-down desk integration with surrounding shelves (creating a complete home office in the smallest possible footprint), and the entryway bench and storage configuration (solving the most common small apartment circulation problem — the lack of a dedicated storage and transition zone at the entry — in a narrow 50cm-deep footprint that most entry halls can accommodate).
Ready to Start Your IVAR Hack?
These 12 ideas span the full range of what an IKEA IVAR shelf hack can become — from a moody matte black library wall that reads as a custom designed architectural feature, and a walnut-stained mid-century media sideboard that belongs in a design magazine, to a limewashed cabinet with aged brass hardware that makes guests ask which antique dealer supplied it, and a floor-to-ceiling room divider that creates two rooms from one open-plan apartment without closing either — so whether you are planning a single weekend project to transform one corner of your home or a more ambitious installation that addresses a full wall or a complete room’s storage needs, there is a genuinely achievable, genuinely beautiful IVAR hack here for your space, your skill level, and your design aesthetic. The hack begins not with the paint color but with the paper plan — the measured, accurate scaled sketch that determines which components you need and how they will relate to the specific architectural context — and continues with the primer that protects the pine and the hardware that elevates the finish. Today’s specific action: measure the space you want to transform, sketch the IVAR configuration that would best serve that space at its correct dimensions, and calculate the component list from that sketch before you visit the IKEA website or store. That sketch and that component list are the difference between an IVAR hack that is planned and one that is assembled, and everything that follows — the painting, the hardware, the integration, the styling — produces its best results when it executes a plan rather than improvising around one. Save the ideas that matched your specific room’s needs and your weekend’s realistic capacity — those are the IVAR hacks that will actually be built, and that will transform your home’s function and aesthetic in exactly the way you imagined when you saved this article.