Easy paper craft ideas for creative adults use accessible materials — card stock, watercolor paper, tissue paper, newspaper, origami paper, and standard printer paper — as the primary medium for handmade objects ranging from home decor and gifting accessories to botanical art, functional stationery, and sculptural makes. This article gives you exactly 14 ideas spanning quilling, origami, paper flowers, bookbinding, collage, papier-mâché, and decorative paper art so every skill level, every budget, and every creative interest finds a paper craft that genuinely engages.
Paper is the most generous craft material available — it is the cheapest, the most universally accessible, the easiest to store, and the most immediately workable without specialist equipment or long drying times. A sheet of card stock and a pair of scissors are the entry point to every idea in this list. The results, when the technique is applied with care and intention, read as genuinely beautiful objects rather than classroom projects. Here are 14 ideas worth saving — and making.—
Why Easy Paper Craft Ideas Work So Well for Creative Adults
Paper craft has the longest continuous history of any domestic creative practice — from the Chinese invention of paper in the 2nd century BCE through the development of Japanese origami as a meditative and ceremonial art form, through the European tradition of marbled and decorated paper bookbinding, through the Victorian scrapbook and decoupage movements, to the contemporary art journaling and paper quilling revival that has made paper craft one of the most actively engaged categories in the adult craft media since approximately 2015. What makes paper an enduring creative medium across every culture and every era is a combination of properties that no other material shares simultaneously: it is cheap enough to experiment freely with, forgiving enough to work without long training, immediately responsive to the hand (cutting, folding, curling, and scoring produce results in real time rather than after drying or curing), and capable, in skilled hands, of achieving results of genuine artistic and material complexity.
The materials that define an excellent adult paper craft practice extend beyond standard office paper to encompass a range of substrates with distinct properties: watercolor paper (140–300gsm, cold or hot press, providing the weight and surface texture that most painted paper applications require), card stock in 200–300gsm weight (the most versatile substrate for structural makes including boxes, cards, and folded forms), Japanese washi paper (thin, strong, and beautiful in its fiber pattern, ideal for decoupage and translucent applications), tissue paper (the most forgiving and most gestural material for paper flowers and botanical makes), origami paper (thin, precisely cut to square, available in hundreds of colors and patterns), newspaper and magazine paper (the accessible material for papier-mâché and collage), and kraft paper (the warmest-toned and most rustic of the accessible substrates, ideal for packaging, wrapping, and stamped or printed applications). Each material has a specific application context in which its properties are assets rather than liabilities, and the most important practical paper craft skill is matching material to technique.
Adult paper crafts have driven substantial online community engagement since approximately 2018, when the stress-relief and mindfulness dimensions of slow, repetitive paper techniques (quilling, origami, iris folding) received significant coverage in wellness media alongside the broader slow-craft revival. Publications from Better Homes and Gardens through to specialist craft magazines consistently feature paper craft as an accessible entry point to adult creative practice precisely because it removes the two primary barriers that deter adults from craft engagement: skill acquisition time (most paper techniques produce satisfying results in a first session) and equipment cost (a pair of scissors, some adhesive, and paper are the complete toolkit for most ideas in this list). The creative ceiling of paper craft — the level of complexity and beauty achievable by an expert — is genuine and documented in the work of contemporary paper artists whose work sells at gallery prices and appears in major design publications, but the floor is genuinely accessible to a complete beginner.
Style at a Glance
| Element | Craft Function | Design Edge |
|---|---|---|
| Philosophy | Immediate material, infinite possibility | Slow making, visible process |
| Materials | Card stock, washi, origami, watercolor paper | Quilling strips, tissue, kraft |
| Skill Range | Complete beginner to experienced maker |
1. Paper Quilling Botanical Wall Art
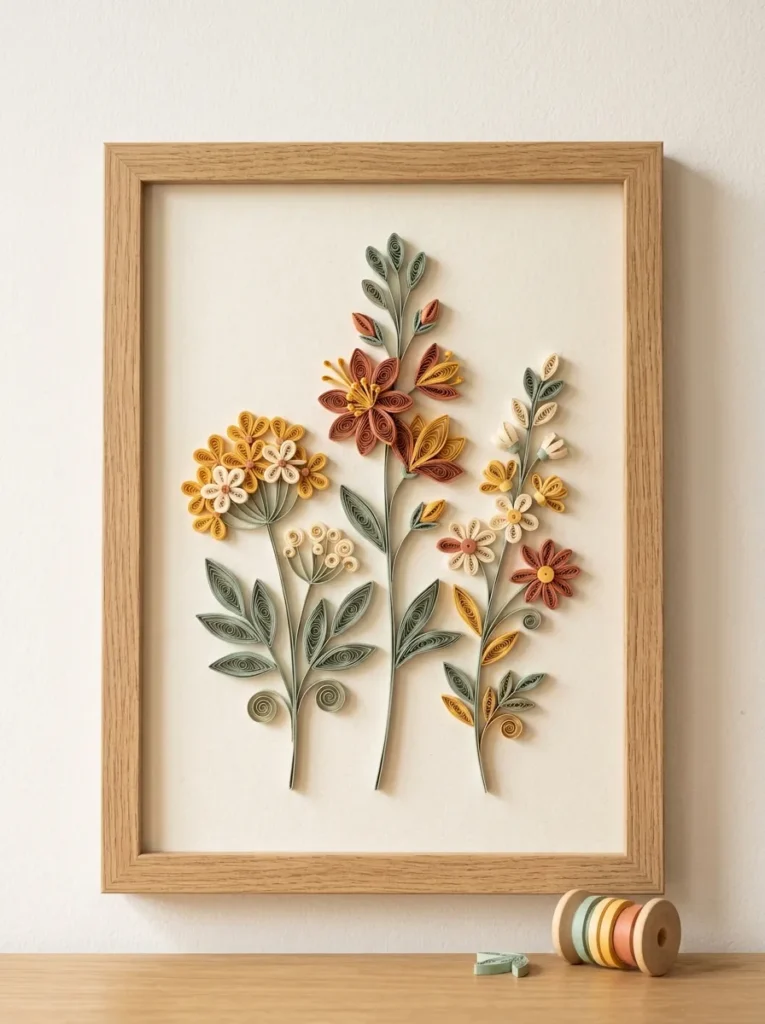
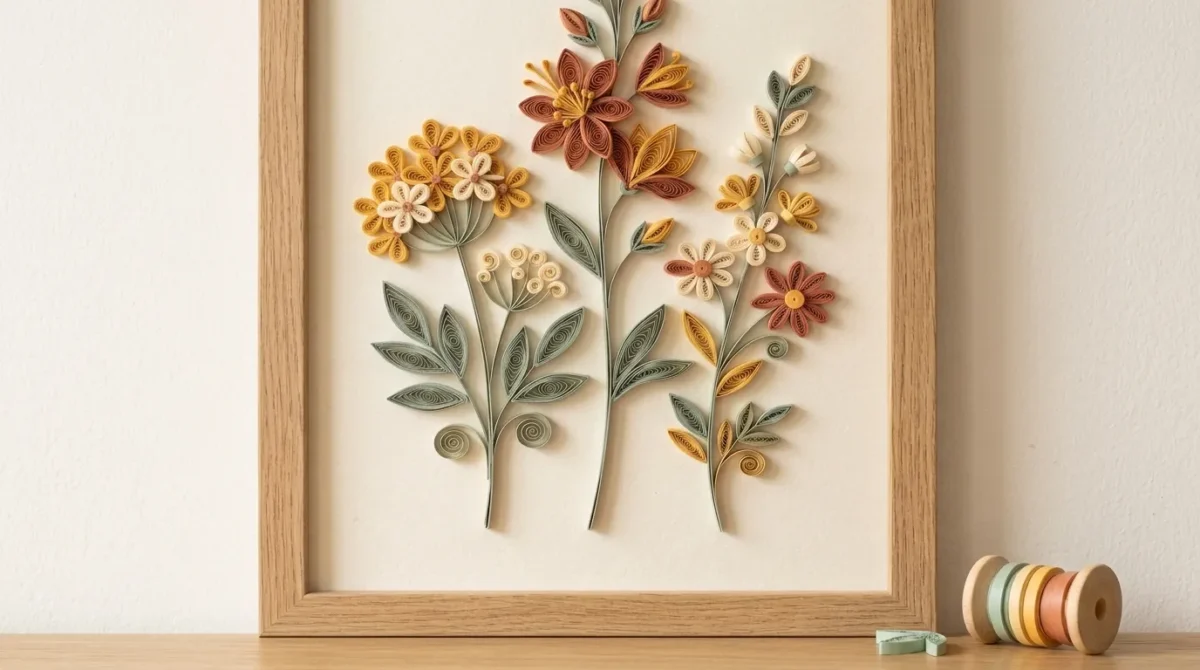
Vibe: The quilling artwork feels three-dimensional rather than flat — the coiled paper elements casting small shadows on the mounting card, the piece somewhere between drawing and sculpture.
Why it works: Paper quilling applies the craft design principle of three-dimensional surface from a flat material — the act of rolling a thin paper strip into a tight coil and then releasing it to a controlled diameter produces a paper element with genuine physical depth (typically 3–5mm height), which, when adhered to a flat mounting surface, creates a bas-relief composition whose shadow detail is as important as its color. This dimensional quality is what distinguishes quilling from flat paper art and makes it genuinely photogenic — any light source at an angle to the surface creates shadows within the coiled elements that add depth the flat photograph cannot fully capture. Botanical forms (wildflowers, leaves, ferns) are the most accessible quilling subject because their organic irregularity means slight variations in coil tension read as natural rather than as technical inconsistency.
How to get it: Purchase a quilling starter kit (available from craft stores and Amazon for $8–15, typically including a slotted quilling tool, a selection of paper strip colors, and a guide to basic coil forms). The fundamental technique: insert the strip end into the tool slot, roll the strip into a tight coil, slide off the tool and allow the coil to relax to the desired diameter, then seal with a tiny dot of PVA glue. Basic coil forms (tight coil, teardrop, marquise, and open coil) combine to create all botanical forms. Assemble on a piece of 200gsm card stock in the frame size you intend to display, adhering each coil element with a toothpick-applied PVA dot. Frame in a deep (15mm) shadow box to accommodate the dimensional elements without the glass crushing them.
Quick Win: A single flower head — five teardrop-shaped coils around one tight central coil — takes approximately 20 minutes to make and mount as a standalone framed piece, making it the most achievable first quilling project for a complete beginner.
Shop The Look
| Product |
|---|
| Paper quilling tool kit slotted set |
| Quilling paper strip set natural tones |
| Deep shadow box frame A5 natural oak |
| PVA glue bottle craft |
| Cream mounting card stock A5 |
Also view: 14 Handmade Gift Ideas That Feel Extra Special
2. Origami Modular Star Decorations
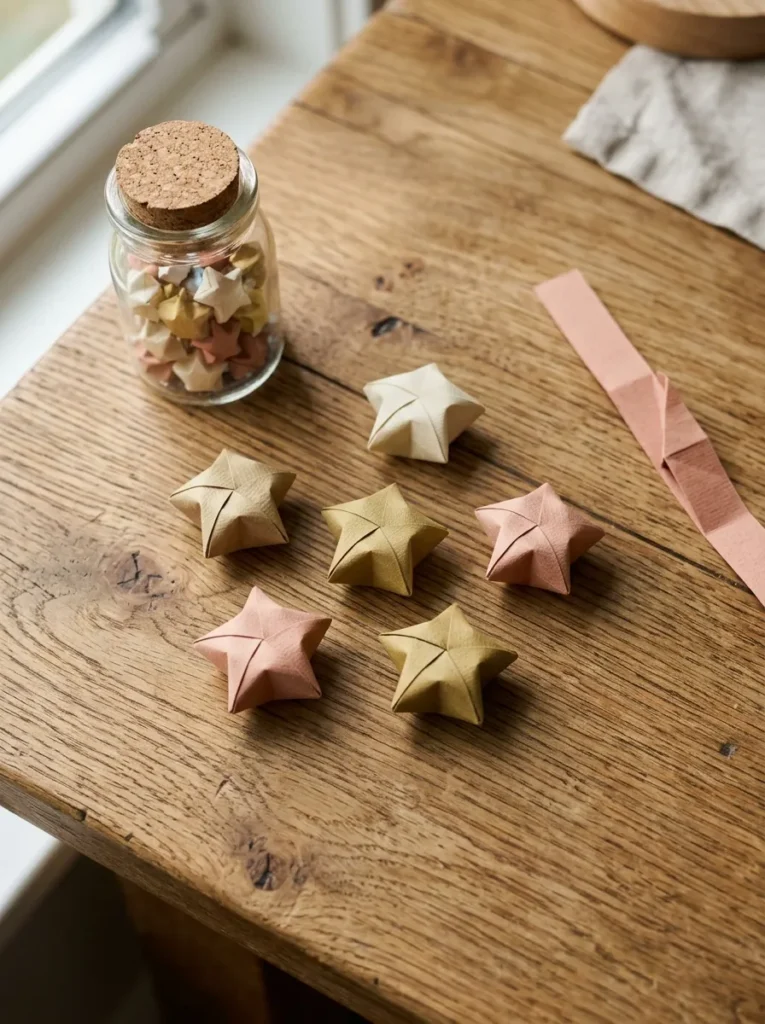
Vibe: The lucky stars feel like something a child made but an adult designed — the specific pleasure of a small perfect object made from a single strip of paper.
Why it works: Origami lucky stars apply the modular origami principle of structural complexity from a single element — a single narrow strip of paper, knotted and folded according to a specific sequence, produces a five-pointed three-dimensional star that holds its shape without adhesive. The technique requires no tools (only fingers), uses the smallest possible quantity of material (one 30cm strip per star), and produces a result that people consistently describe as surprisingly satisfying to make and surprisingly beautiful as a finished object. Collecting lucky stars in a glass jar (a classic display format with thousands of documented variations in Asian craft culture, where filling a jar with 1,000 lucky stars is associated with wish-granting) creates a complete, displayable craft project from the accumulation of identical small units.
How to get it: Use strips approximately 1cm wide and 25–30cm long — origami paper, washi paper, or magazine paper all work well. Create a loose overhand knot near one end of the strip and flatten it into a regular pentagon shape by pulling both ends gently. Wrap the longer end of the strip around the pentagon in the same direction, following the pentagon’s edges. Tuck the final end into the fold. Pinch each of the five sides of the pentagon inward simultaneously with your fingertips to inflate the three-dimensional star form. The star is complete — no glue required. Make a hundred and store in a clear glass jar, a hundred and string on thread for a garland, or twenty and scatter on a table for an event decoration.
Shop The Look
| Product |
|---|
| Origami paper strip set assorted |
| Washi paper strip set patterned |
| Clear glass jar large display |
| Fine thread garland stringing |
| Small scissors precise craft |
Also view: 14 KALLAX Bookshelf Ideas That Look Designer Made
3. Tissue Paper Peony Flowers for Display
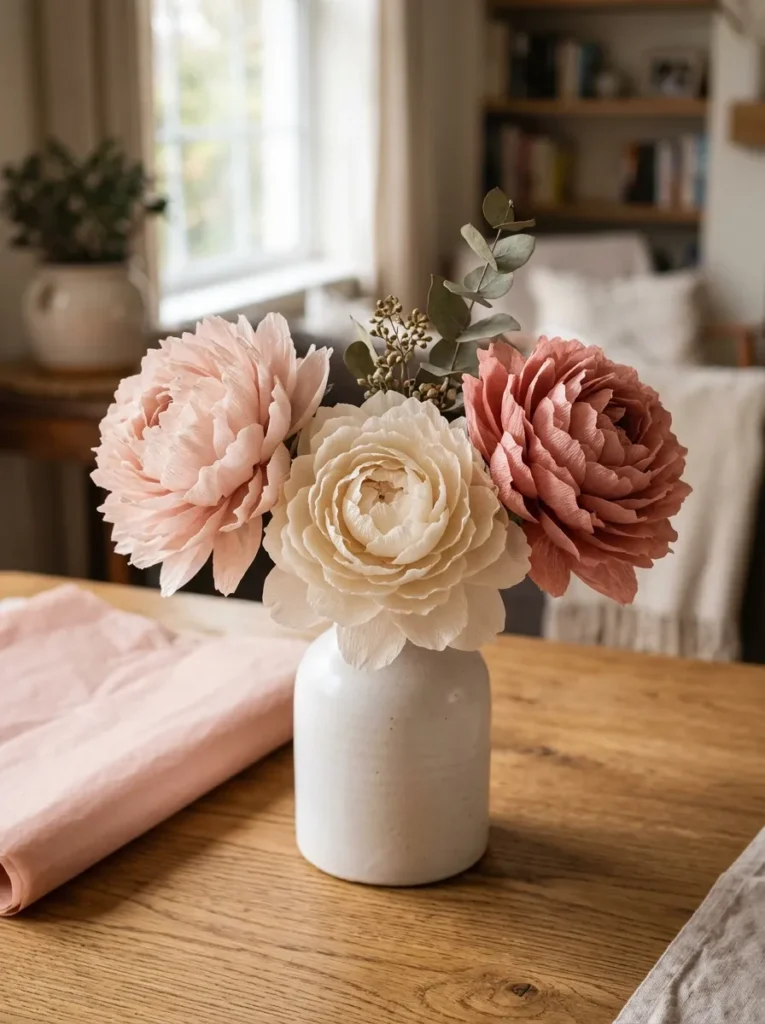
Vibe: The tissue peonies feel like a garden arrangement that never wilts — full-petaled and dimensional in a way that the source material (tissue paper) seems entirely incapable of producing.
Why it works: Tissue paper peonies apply the layering principle of volumetric form from a flat material — stacking multiple sheets of tissue paper, cutting a rounded petal form through all layers simultaneously, and then separating and curling each layer upward produces a flower with genuine dimensional petal separation and a full, rounded silhouette that references the peony’s distinctive cupped form. Tissue paper is the ideal material for this application because its thinness allows many layers to be stacked without excessive bulk (giving the finished flower its characteristic lightness) and its semi-transparency creates gentle tonal variation as layers overlap. The technique is entirely achievable in a first attempt and produces results that are consistently used in professional event decoration contexts.
How to get it: Stack six to eight sheets of tissue paper in the chosen color (or gradient from one tone to another). Draw a rounded petal shape approximately 12cm in diameter and cut through all layers simultaneously with sharp scissors. Cut small notches around the outer edge of the petal form to create fringe that reads as petal separation. Gather all layers at the center and scrunch to create a stem-like base. Secure the base with a short length of thin floral wire. Separate each tissue layer by gently pulling it upward and toward the center, curling slightly against the edge of a pencil if additional curl is desired. Insert the wire stem into a floral stem or tape to a dowel.
Shop The Look
| Product |
|---|
| Tissue paper set blush cream rose |
| Thin floral wire 26 gauge |
| Sharp craft scissors precise |
| White ceramic vase medium |
| Floral tape green stem |
4. Decoupage Glass Vase with Washi Paper
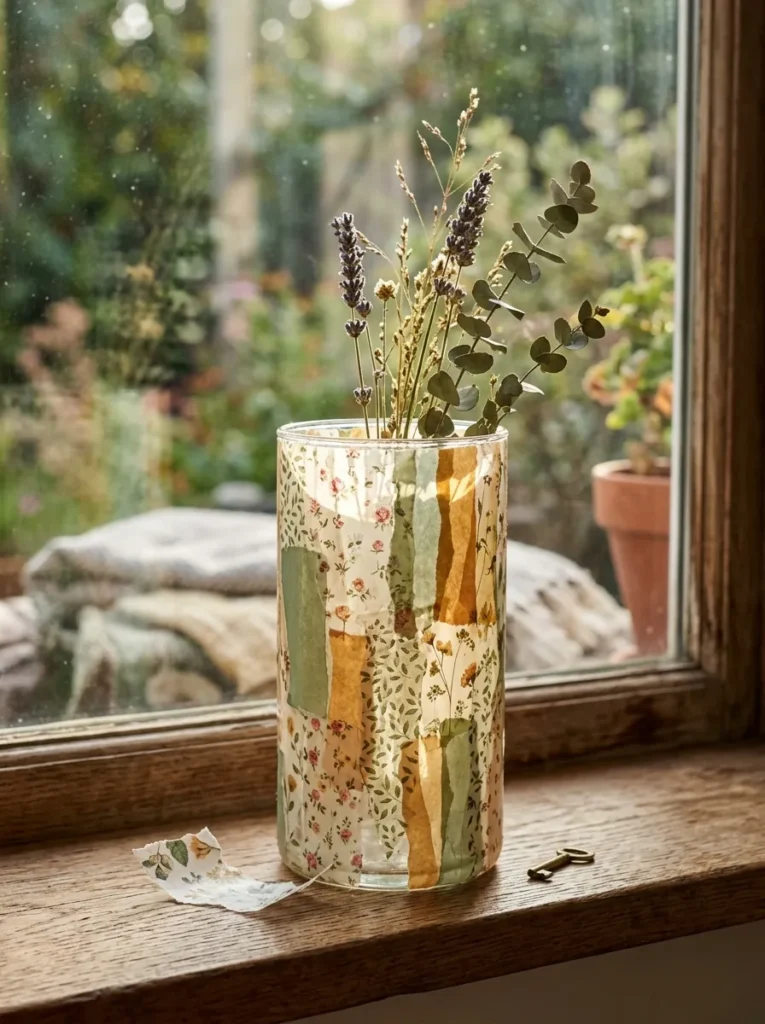
Vibe: The decoupaged vase feels like stained glass made accessible — the washi paper layers creating a warm translucent color field that ordinary paint on glass cannot replicate.
Why it works: Washi paper decoupage on glass applies the optical principle of layered translucency — washi paper’s fiber structure is semi-transparent (thin enough for light to pass through while retaining its color and pattern), which means each layer adhered to the glass exterior creates a depth of translucent color that the light source behind the vase illuminates. This backlighting effect, where warm window light passes through successive washi layers, produces a quality of warm, diffused color that genuinely resembles the interior glow of antique stained glass. Decoupage medium (Mod Podge or equivalent) applied over washi paper on glass creates a permanent, moisture-resistant seal that keeps the paper permanently adhered to the glass surface without yellowing or peeling over time.
How to get it: Clean the glass vase thoroughly with isopropyl alcohol to remove fingerprints and oils that would prevent adhesion. Tear washi paper into irregular pieces approximately 3–5cm — torn edges blend into the layers more naturally than cut edges. Brush a thin, even coat of Mod Podge Gloss onto a small section of the glass exterior. Press a washi piece into the wet medium, smooth flat with a brush, then apply another coat of Mod Podge over the washi surface to seal. Continue in overlapping sections until the vase exterior is covered to the desired density. Allow to dry for one hour, then apply two full sealing coats over the entire exterior surface. Allow 24 hours of full cure before using with water and flowers.
Shop The Look
| Product |
|---|
| Washi paper set botanical print assorted |
| Mod Podge gloss decoupage medium |
| Glass vase clear simple form |
| Wide brush set foam application |
| Isopropyl alcohol prep wipe |
5. Hand-Bound Notebook with Japanese Stab Binding
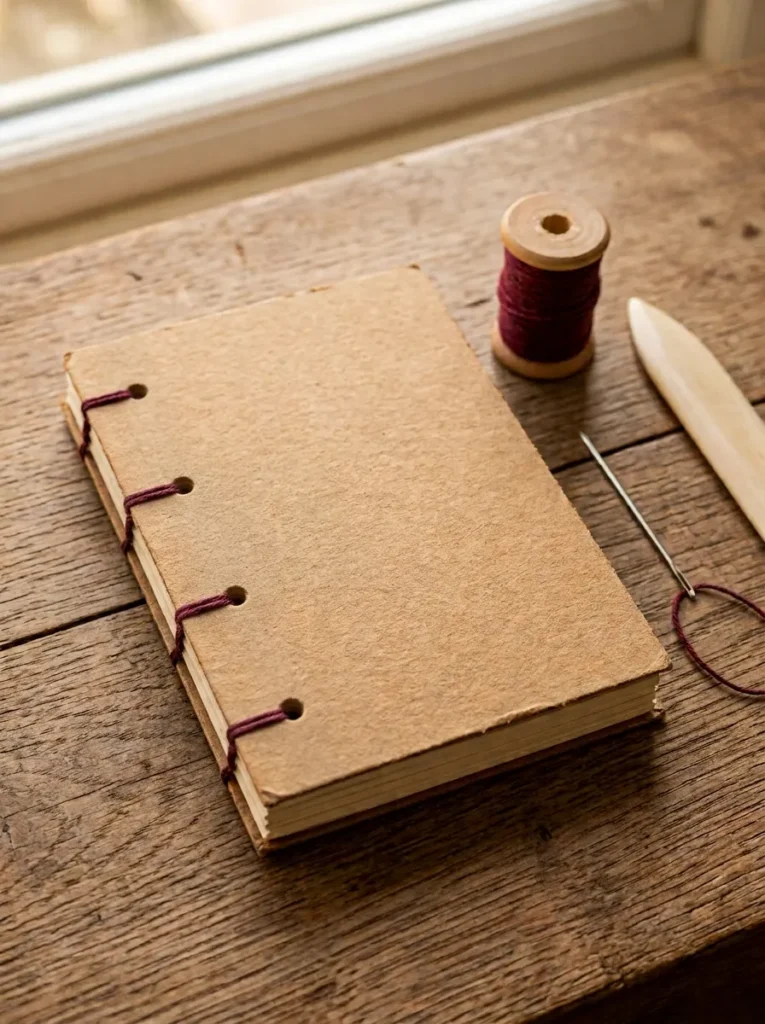
Vibe: The hand-bound notebook feels like a keepsake before anything has been written in it — the exposed spine thread communicating the craft of making as prominently as the pages communicate the potential of using.
Why it works: Japanese stab binding applies the bookbinding principle of structural transparency — rather than concealing the binding mechanism inside a perfect-bound or case-bound spine, stab binding celebrates the sewing pattern as the cover’s primary decorative element. The four-hole stab binding pattern (the simplest and most accessible Japanese bookbinding pattern) requires only a needle, thread, an awl, and a ruler, producing a completely functional, durable binding in under thirty minutes for a complete beginner. The exposed thread on the cover face creates the visual character that makes hand-bound notebooks more desirable as gifts and personal objects than their commercially produced equivalents — the thread is simultaneously the structural mechanism and the decorative statement.
How to get it: Cut 15–20 sheets of 80gsm paper to the desired notebook size (typically 10×15cm or A6). Cut a slightly heavier card cover (200–300gsm kraft or patterned card) to the same dimensions. Align all pages with the cover and clip together with binder clips along the binding edge. Mark four equidistant holes along the binding edge approximately 5mm from the spine and punch through all layers with an awl or thick needle. Thread a long length of linen thread through the holes in the four-hole pattern (outside in at hole 1, inside out at hole 2, outside in at hole 3, inside out at hole 4, then reverse direction back through holes 3, 2, and 1 to distribute tension). Tie off at the starting hole with a square knot and trim ends to 1cm.
Shop The Look
| Product |
|---|
| Kraft card stock 300gsm sheets |
| Linen bookbinding thread set |
| Bookbinding awl sharp point |
| Bone folder scoring tool |
| Binder clip set small stationery |
6. Paper Collage — Torn Magazine Landscape
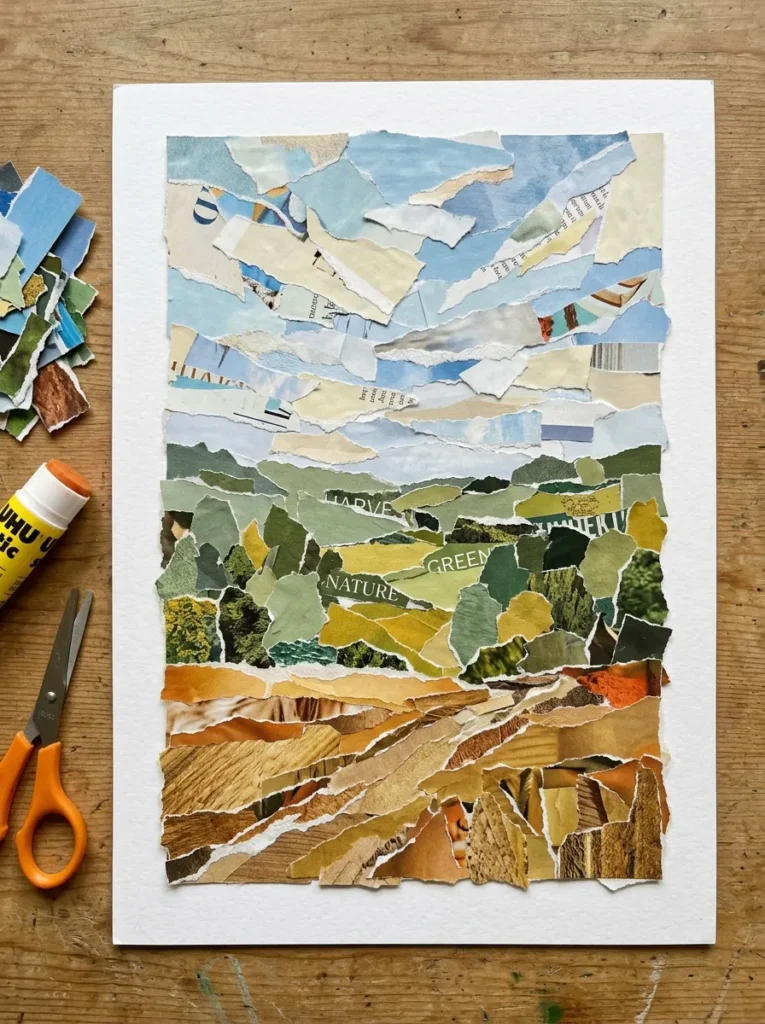
Vibe: The collage landscape feels surprisingly atmospheric — the torn paper edges doing the work of brushstroke blending in a medium with no brushes.
Why it works: Torn magazine paper landscape collage applies the visual art principle of color field composition through found material — instead of selecting and applying color deliberately (as in painting), the collage-maker curates color from existing printed sources (magazine pages, printed paper, book pages), which introduces a subtle complexity to each “color area” in the composition that flat paint cannot replicate. A blue sky section in a magazine collage contains the printed text, photograph, and ink variation of the original magazine page, giving the sky area a textural richness that a flat blue wash would lack. Torn edges (rather than cut edges) produce organic, irregular boundaries between landscape zones that mimic the soft transitions of a distant treeline or a horizon far more effectively than any cut edge could.
How to get it: Collect magazines in the dominant color families needed for the composition — lifestyle magazines are the best source of large, photograph-heavy color fields. Begin the collage from the background (sky) zone, tearing pieces in the lightest tones of blue and cream and adhering to the card stock base using a glue stick. Work progressively forward in the compositional space, layering torn pieces with each new zone slightly overlapping the previous, working from the top of the paper (sky) to the bottom (foreground). Allow torn edges to remain proud at each overlap — the slight three-dimensionality of the layered torn edges adds depth visible in raking light.
Shop The Look
| Product |
|---|
| Magazine collection varied colors set |
| Glue stick strong repositionable |
| White card stock A4 200gsm set |
| Ruler tearing guide clean edge |
| Mounting frame A4 simple natural |
7. Iris Folding Card for Special Occasions
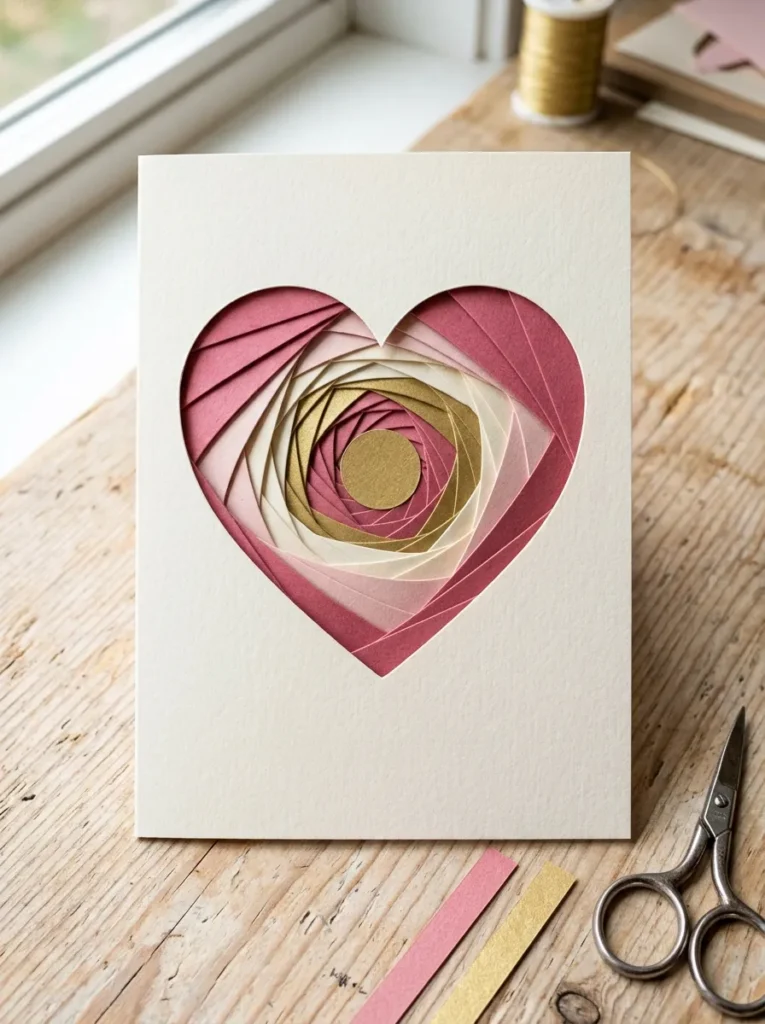
Vibe: The iris folding card feels technically precise and visually surprising — the geometric pattern achieved through paper folding reading as more complex than its method warrants.
Why it works: Iris folding applies the optical design principle of concentric pattern from sequential strip placement — paper strips folded in half and placed in a rotating sequence around an aperture cut in a card front create a spiral pattern that, when viewed from the front of the card, reads as a complex geometric design. The technique is worked from the back of the card (the pattern is placed upside-down on a template) and revealed when the card is turned over, creating the satisfying moment of a design that appears fully only when complete. The name “iris folding” references the visual similarity of the finished pattern to the diaphragm of a camera lens — the same concentric, rotationally symmetric geometry. It is a method that produces results of genuine visual sophistication from a technique accessible to a complete beginner.
How to get it: Select a blank card with an aperture cut in the front (available pre-cut from craft stores, or cut your own using a craft knife and a template). Download or draw an iris folding template for the aperture shape — the template divides the aperture into numbered sections that indicate the order and position of each strip placement. Cut paper strips approximately 2cm wide from patterned or solid papers in four coordinating colors, fold each strip in half lengthwise, and place them in numbered sequence on the template (viewed from the back of the card). Secure each strip with a small piece of low-tack tape as you work. When all sections are filled, the template is complete — add a piece of card to the back to hide the tape and neaten the interior.
Shop The Look
| Product |
|---|
| Blank aperture card set assorted shapes |
| Iris folding template sheet set |
| Patterned paper set coordinating tones |
| Low-tack tape craft adhesive |
| Craft knife and cutting mat set |
8. Paper Bead Jewelry from Magazine Strips
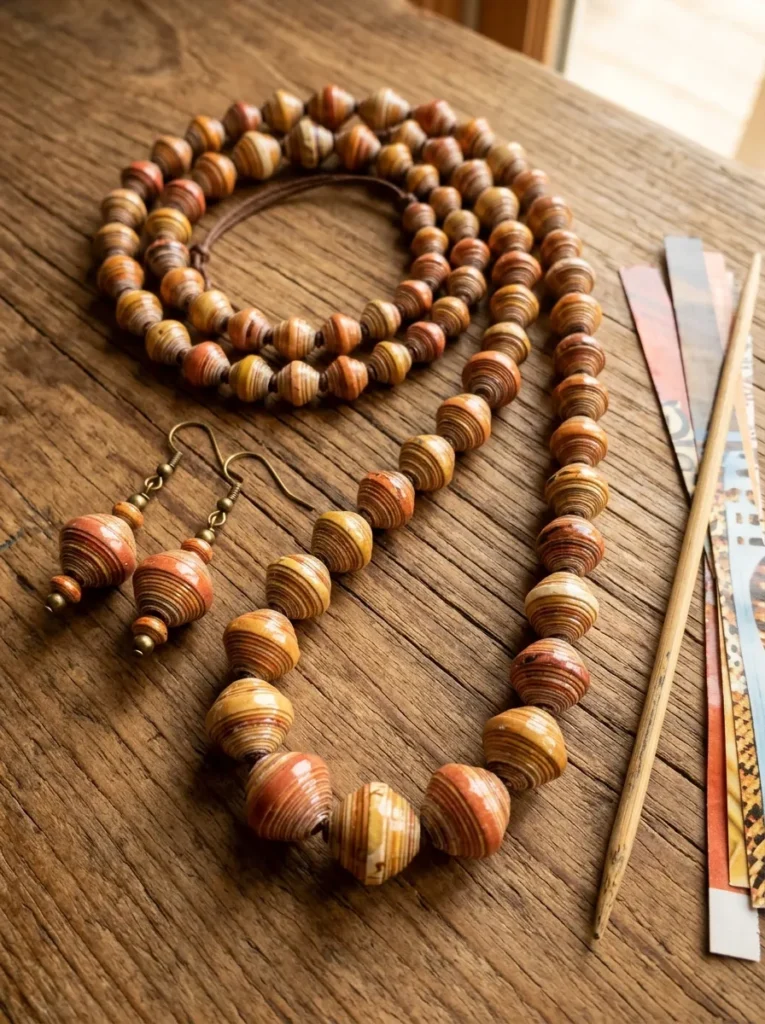
Vibe: The paper bead jewelry feels warm and genuinely wearable — the glossy seal transforming rolled magazine paper into something that reads as handmade ceramic or lacquered wood.
Why it works: Paper bead jewelry applies the transformation principle of material upgrading through finishing — the raw paper bead, before sealing, reads as exactly what it is: a rolled strip of magazine paper. The same bead after three coats of clear gloss sealant reads as a smooth, polished object with the visual quality of lacquered wood or ceramic, because the glossy surface hides the paper’s edge detail and communicates material density that the paper’s actual weight does not possess. The technique’s appeal lies in this transformation — the significant gap between the starting material (free magazine paper) and the finished object (glossy jewelry bead) generates the surprise value that makes paper bead making both satisfying to the maker and impressive to the recipient.
How to get it: Cut long triangular strips from magazine pages (approximately 1cm at the wide end, tapering to a point at the narrow end, approximately 30cm long). Apply a thin line of PVA glue along the strip’s surface on the printed side. Starting at the wide end, roll the strip tightly around a bamboo skewer, keeping the strip aligned centrally as it rolls. The tapered end produces the bead’s characteristic oval bulge. Slide off the skewer before the glue is completely dry, maintaining the hole. Allow to dry fully. Apply three coats of clear acrylic gloss sealant, allowing each coat to dry before the next. String on nylon beading thread or leather cord.
Shop The Look
| Product |
|---|
| Magazine collection varied warm tones |
| PVA glue bottle fine tip |
| Bamboo skewer set thin rolling |
| Clear acrylic gloss sealant brush |
| Nylon beading thread set |
9. Paper Cutting — Botanical Silhouette Art
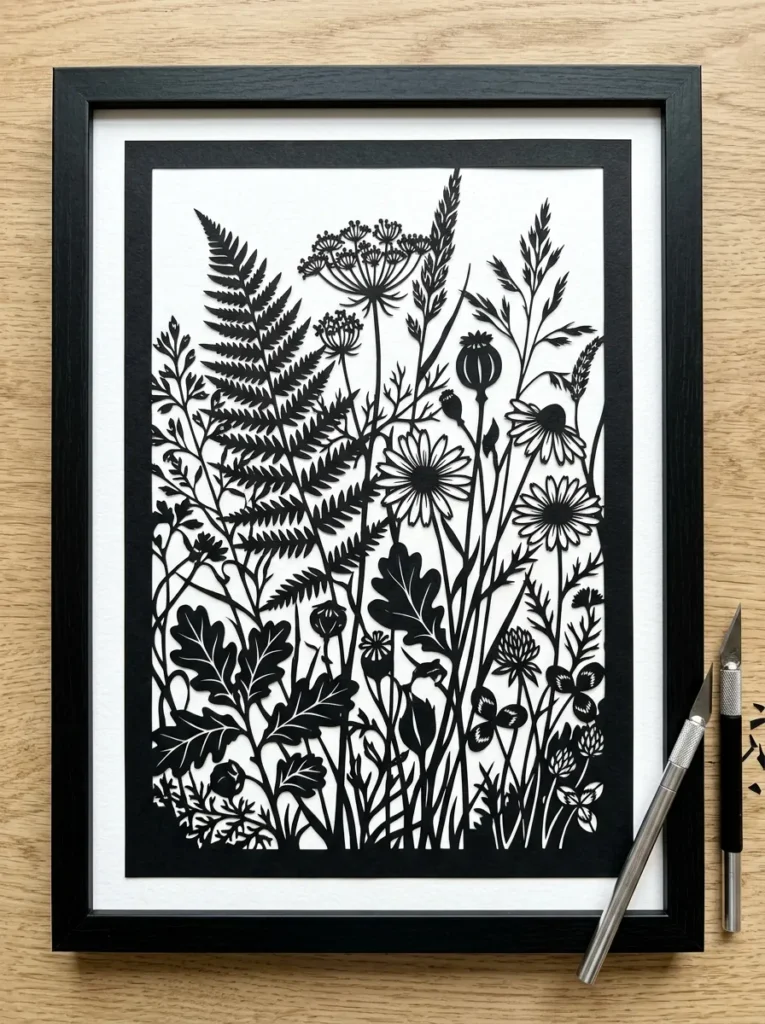
Vibe: The paper cut artwork feels architectural — the black silhouette against white creating graphic precision that reads as a designed print rather than a handmade paper object.
Why it works: Botanical paper cutting applies the visual art principle of negative space as the primary drawing medium — in paper cutting, the artist does not draw lines on paper but removes paper to create the image, which means the visual content of the work exists in the absence of material rather than in its presence. This inversion of the usual drawing relationship produces a visual quality unique to the medium: the viewer’s eye is drawn to the empty spaces (where the paper has been cut away) rather than to the paper itself, creating an image that inhabits the light rather than the surface. The botanical subject (leaves, stems, wildflowers) is particularly suited to paper cutting because the organic, branching forms of botanical structures translate naturally into the cut-and-leave decision structure of the technique.
How to get it: Print or draw the chosen botanical design (a sprig of leaves, a wildflower stem, a fern frond) lightly on the back of a sheet of 120gsm black card. Secure the card to a self-healing cutting mat. Using a new, sharp craft knife blade (blade sharpness is the single most impactful variable in paper cutting quality — a dull blade tears rather than cuts, and blade replacement should happen every 30–60 minutes of cutting), cut from the smallest interior details outward, leaving the largest structural elements until last. Cut with confident, single strokes rather than sawing motions. Mount the completed cut piece on white card with spray adhesive, pressing flat under a heavy book for 30 minutes.
Shop The Look
| Product |
|---|
| Black card stock 120gsm A4 set |
| Craft knife precision sharp blade |
| Self-healing cutting mat A3 |
| Spare blade set craft knife |
| Spray adhesive repositionable |
10. Papier-Mâché Geometric Bowl
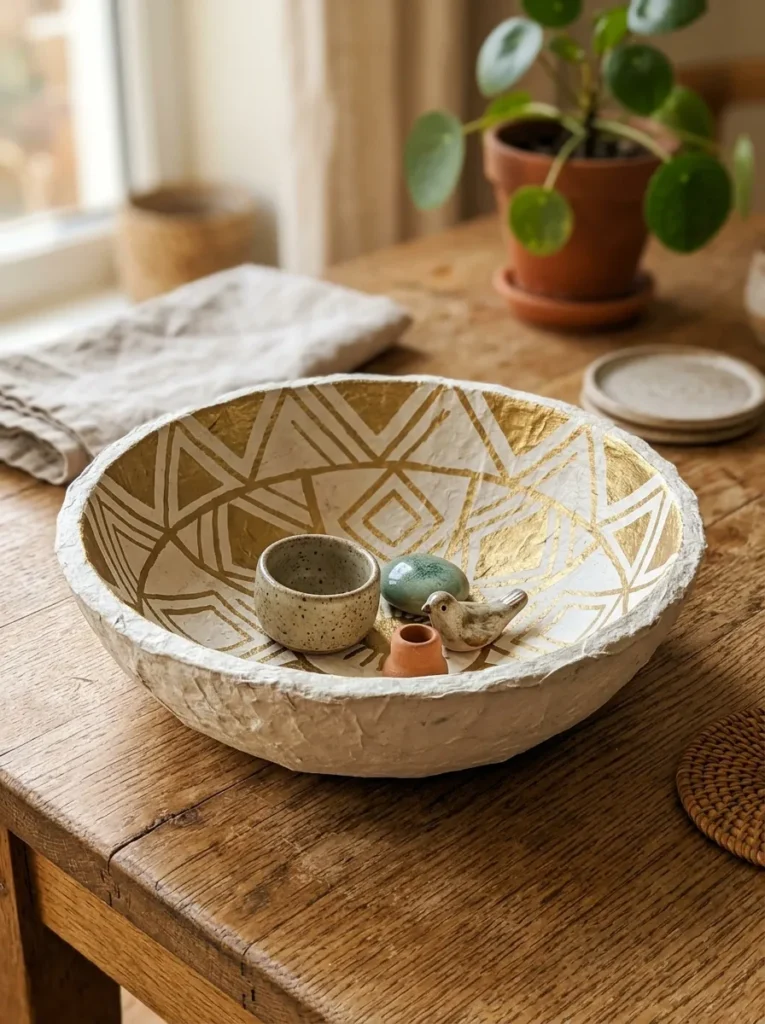
Vibe: The papier-mâché bowl feels genuinely considered — the chalk paint and gold geometric pattern elevating a newspaper-and-glue construction into something that reads as a design object.
Why it works: Papier-mâché bowls apply the design principle of material transformation through finishing — the starting material (newspaper and diluted PVA glue) is inherently humble and associated with children’s craft, but the finishing sequence (chalk paint for a smooth matte surface, a painted geometric pattern) completely displaces the material’s original associations and produces an object whose aesthetic register is determined by the finishing quality rather than the construction material. The geometric pattern on the interior is the critical design decision — it reads as intentional and considered, transforming what might otherwise be a painted bowl into a designed ceramic-equivalent. The bowl’s practical function (holding keys, jewelry, small objects) extends the object’s presence in the recipient’s home from purely decorative to genuinely useful.
How to get it: Apply petroleum jelly or cling film as a release agent to the outside of a bowl used as a mold. Tear newspaper into strips approximately 2×10cm. Mix PVA glue with water in a 2:1 ratio. Dip each strip in the glue mixture, remove excess with fingers, and layer onto the bowl mold surface, overlapping each strip slightly. Apply four to six layers, allowing each pair of layers to dry before adding the next two. When fully dry (24–48 hours), remove from the mold, trim the rim edge with scissors, and sand lightly. Apply two coats of chalk paint in the chosen color. Paint the interior geometric pattern using a fine brush and gold acrylic paint. Seal with two coats of matte Mod Podge.
Shop The Look
| Product |
|---|
| Newspaper roll or collection craft |
| PVA glue white 500ml bottle |
| White chalk paint 250ml |
| Gold acrylic paint fine detail |
| Matte Mod Podge sealer finish |
11. Botanical Pressed Flower Gift Wrapping
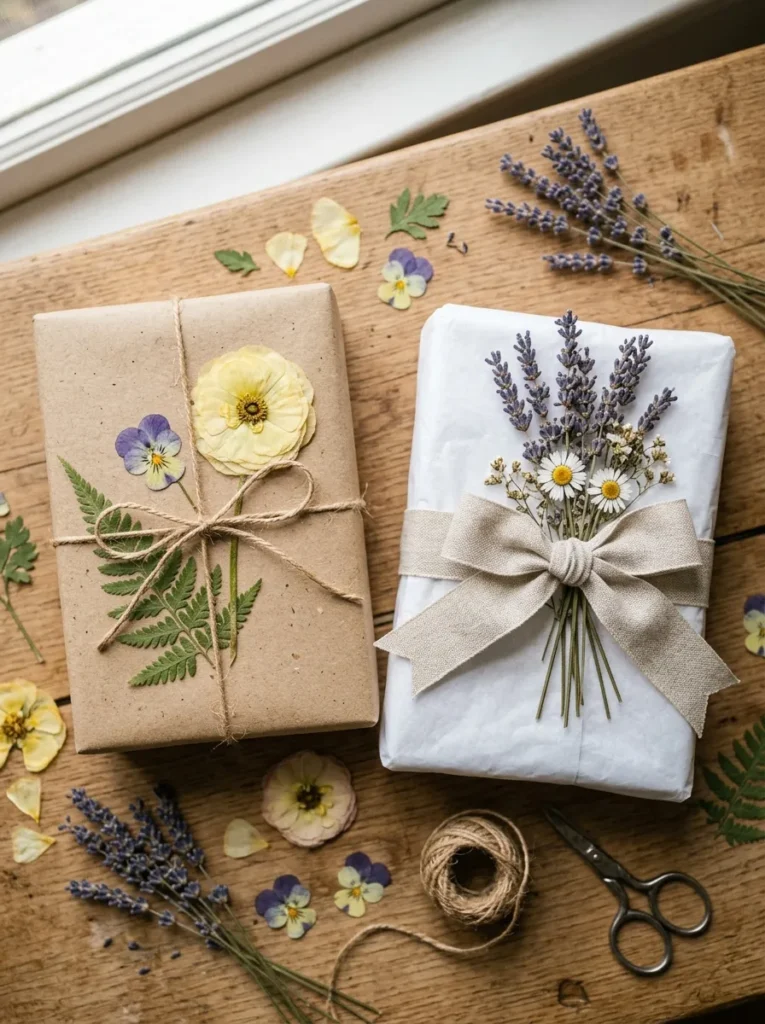
Vibe: The botanical gift wrapping feels like the presentation is already the first gift — a wrapped object that the recipient slows down to look at before opening.
Why it works: Pressed flower gift wrapping applies the gift presentation principle of material gifting — when the wrapping itself is a made object (rather than a purchased sheet of commercial wrapping paper), the presentation communicates the maker’s investment before the gift inside is even considered. The specific combination of kraft paper (honest, natural, warm) and pressed botanical elements (organic, specific, seasonal) creates a presentation aesthetic that references both Japanese gift wrapping traditions (where presentation has equal status with content) and the contemporary slow-living aesthetic that values natural materials and visible handwork. The pressed botanical elements are themselves a small additional gift — most recipients preserve the wrapping rather than discarding it.
How to get it: Press flowers and small botanical elements (violas, small daisies, ranunculus, fern fronds) between book pages or in a flower press for a minimum of two weeks, until fully dry and flat. Wrap the gift in kraft paper or plain white tissue paper. Position the pressed botanicals on the paper surface and adhere using a single dot of clear-drying craft glue on each element’s back. Allow to dry flat for 30 minutes before tying. Complete the wrapping with natural jute twine, linen ribbon, or wide washi tape — avoid synthetic ribbons that visually conflict with the botanical aesthetic.
Shop The Look
| Product |
|---|
| Kraft paper roll wrapping natural |
| Pressed flower set assorted small |
| Natural jute twine roll |
| Clear drying craft glue fine tip |
| Flower press wooden craft |
12. Paper Lantern String Lights
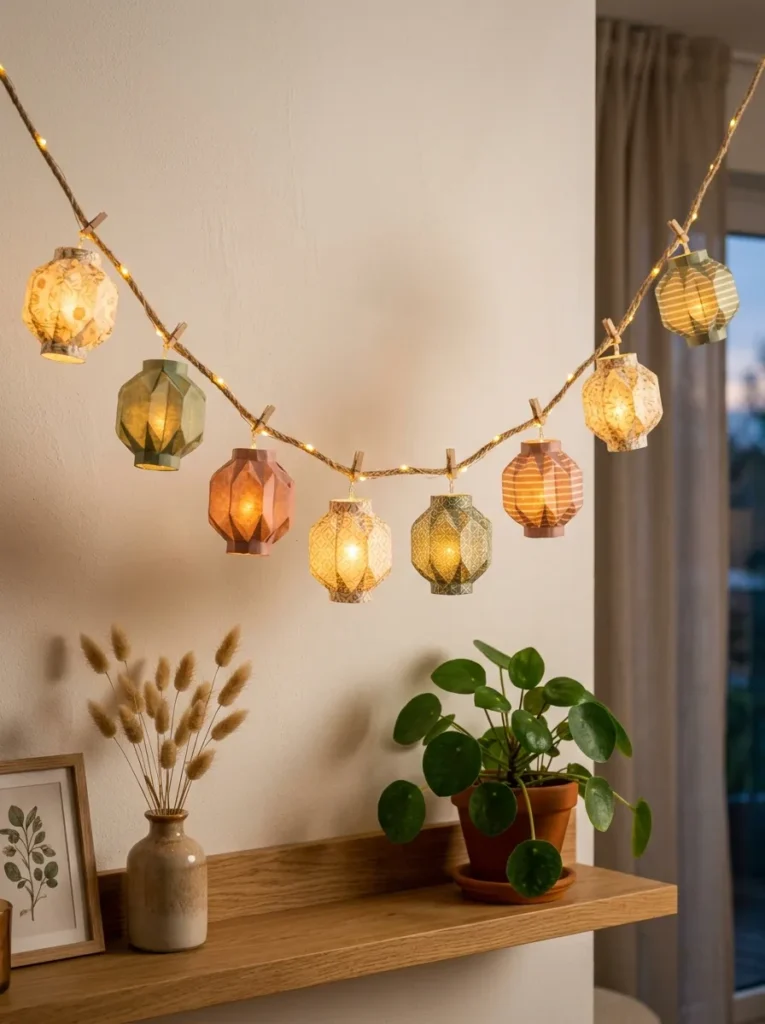
Vibe: The paper lantern garland feels like warmth has been given a physical form — the patterned paper and LED glow creating a decorative object that is as functional as it is beautiful.
Why it works: Paper lanterns on a string light apply the illumination design principle of diffused warm point source — a bare LED on a string light reads as a functional lighting tool; the same LED inside a paper cylinder reads as a decorative warm-light source because the paper diffuses the point source of light into a warm, even glow across its entire surface. The patterned origami paper is specifically appropriate because its varied print creates visual interest in daylight (when the light is off and the pattern is the primary feature) and a warm printed glow at night (when the light passes through the pattern). The garland format allows the same simple lantern unit to create a room-scale decorative installation from the repetition of one simple object — the accumulation of identical units is itself a compositional technique.
How to get it: Cut a rectangle of patterned origami or washi paper to 15×20cm. Fold in half along the long dimension. Cut parallel slots from the folded edge toward the open edge, stopping approximately 2cm from the open edge — these slots create the lantern’s characteristic side openings when the form is curved. Unfold and roll the paper into a cylinder, overlapping the short edges by 1cm and securing with a thin strip of double-sided tape. Flatten a separate 1×20cm strip of paper into a handle and tape inside the top of the cylinder as a carrying loop. Thread the lantern onto a battery-powered LED string light through the handle loop.
Shop The Look
| Product |
|---|
| Origami paper set patterned assorted |
| Washi paper set botanical print |
| Battery LED string light warm white |
| Double-sided tape narrow craft |
| Small scissors precise craft |
13. Accordion Paper Gift Box
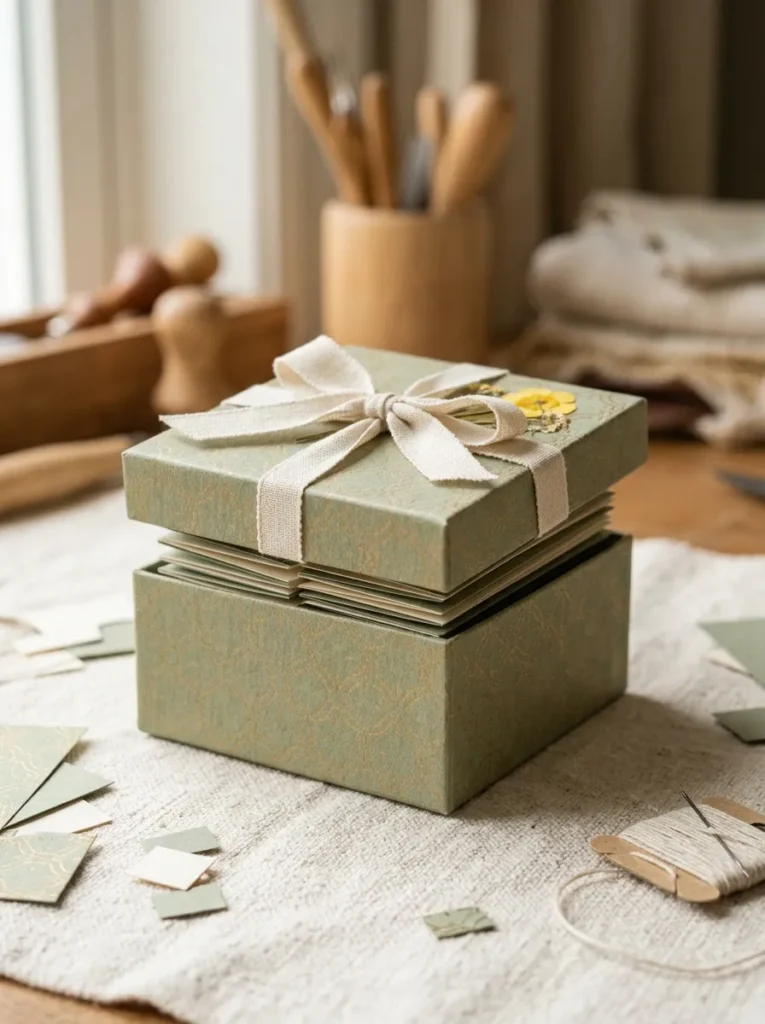
Vibe: The accordion gift box feels more considered than its contents — the kind of packaging that the recipient keeps long after the gift inside is used.
Why it works: A handmade accordion gift box applies the packaging design principle of structure as gift — a box that is itself a made object (rather than a purchased box filled with tissue paper) communicates the maker’s craft investment at the presentation level as well as the content level. The accordion interior (a scored and folded card stock insert that creates small individual compartments for multiple small items) adds a functional dimension — a single handmade box becomes an organizational system for a collection of small gifts (jewelry pieces, herb seeds, lip balm, a folded note) that can be displayed simultaneously when the lid is opened. The cover paper (a coordinating decorative paper) provides the visual character while the structural card stock provides the rigidity.
How to get it: Score and fold a 22×22cm piece of 300gsm card stock into a flat tray shape (sides approximately 4cm high on each of four sides) by cutting a 4×4cm square from each corner and folding the sides up. Apply decorative paper to the exterior using a glue stick. Create the accordion interior from a strip of 80gsm paper 8cm wide and 40cm long, scored and folded into equal accordioned sections. Fit inside the box base. Create a matching lid from a 22.5×22.5cm piece (slightly larger to fit over the base) using the same process. Tie the closed box with linen ribbon.
Shop The Look
| Product |
|---|
| Card stock 300gsm white sheets |
| Decorative paper set patterned |
| Bone folder scoring crease tool |
| Linen ribbon set natural cream |
| Glue stick strong adhesive |
14. Watercolor Paper Art Card Collection
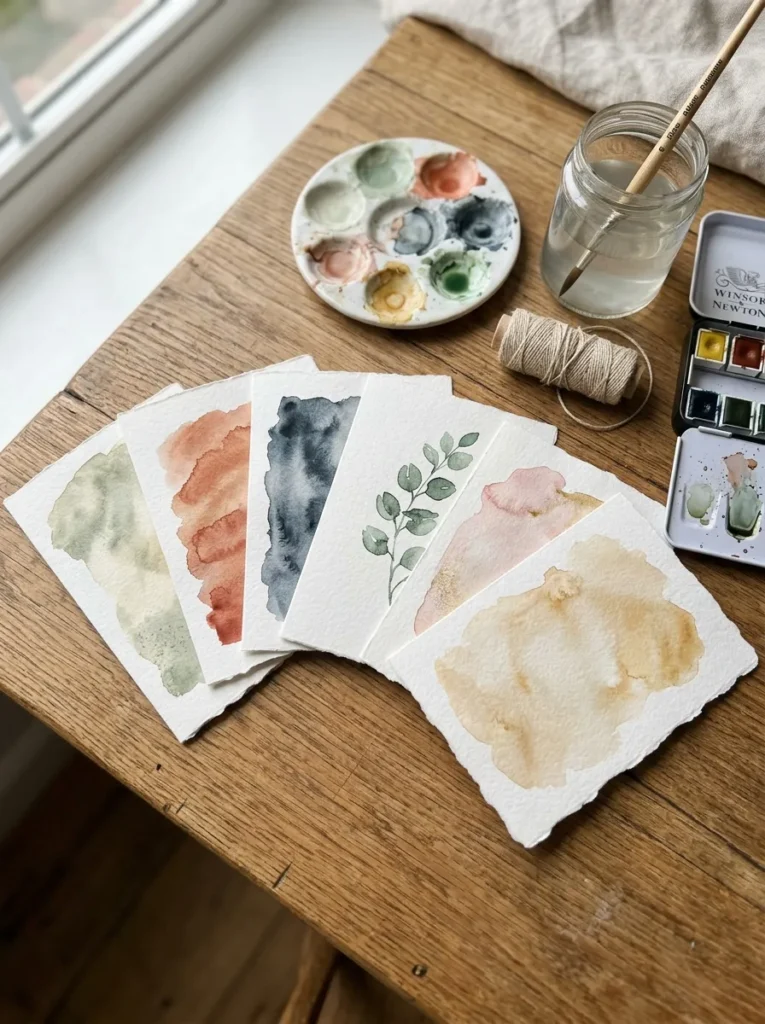
Vibe: The watercolor art cards feel like miniature artworks that happen to be functional — the kind of card that the recipient frames rather than discards.
Why it works: Handmade watercolor art cards apply the gift design principle of functional art — a card that is genuinely beautiful as a visual object provides the recipient with both the functional purpose of a card (a vehicle for a written message) and the aesthetic pleasure of a small artwork. Using 300gsm watercolor paper rather than standard card stock is the critical material decision — the heavier weight allows wet watercolor application without buckling, and the cold-press texture provides the characteristic grainy, luminous quality that distinguishes watercolor on appropriate paper from watercolor on standard card. Abstract wash (rather than representational subjects) is the most achievable approach for non-painters — wet-on-wet watercolor washes on dampened paper produce organic, beautiful color fields with no painting skill required, making them the paper craft equivalent of a technique that is easier than it looks.
How to get it: Cut 300gsm watercolor paper to A6 size (10.5×14.8cm) — a single A4 sheet yields four A6 cards. Dampen the paper surface with clean water applied with a wide flat brush. While the surface is wet, drop concentrated watercolor paint (from a tube or cake set) onto specific areas of the damp surface and allow the color to bloom and migrate through the wet paper without directing it — the water carries the pigment naturally. Add a second color to specific areas for a tonal blend. Allow to dry flat completely before scoring and folding to a card format. The slight cockle (texture) from the water application is a desirable quality rather than a defect in watercolor paper.
Shop The Look
| Product |
|---|
| Watercolor paper 300gsm cold press A4 |
| Watercolor paint set tubes or cake |
| Wide flat watercolor brush set |
| Bone folder scoring fold tool |
| Kraft envelope set A6 matching |
How to Start Your Paper Craft Practice
The single best first move before beginning any paper craft project is investing in one quality tool rather than a large quantity of materials — specifically, a bone folder. A bone folder (a smooth, rounded tool used for scoring crisp fold lines and burnishing paper surfaces) is the difference between a paper craft that reads as handmade-professional and one that reads as handmade-approximate, because the quality of a fold, crease, or scored line determines the structural precision of every folded or assembled paper form in this list. A bone folder costs $6–10, lasts indefinitely, and improves the quality of every paper craft technique simultaneously. No quantity of additional paper or decorative materials compensates for the structural imprecision that hand-folded paper without a scoring tool produces.
The most common mistake in adult paper craft is selecting a project whose difficulty level is significantly above the maker’s current skill and patience threshold, becoming frustrated when the first attempt does not match the aspirational reference image, and abandoning the technique before the second attempt produces the improvement that experience reliably delivers. The fix is deliberately choosing a project one level simpler than the one that attracted you initially — if iris folding cards represent the target, begin with pressed flower bookmarks; if quilling botanical art is the goal, begin with a single quilling flower and frame it alone before attempting a multi-element composition. The simpler project produces a satisfying finished object quickly, builds technique confidence, and provides a material foundation for the more complex target project.
Three specific items under $50 that equip a complete adult paper craft starter kit: a bone folder ($6–10, providing the scoring and burnishing tool that improves every paper technique in this list); a pack of 300gsm white card stock in A4 and A5 sizes ($8–12 for 50 sheets, the structural substrate for boxes, bookbinding, quilling mounts, and papier-mâché painting); and a bottle of Mod Podge Gloss ($7–10, the universal sealing and decoupage medium that finishes, protects, and adheres paper in approximately eight of the fourteen ideas in this list). These three items combined for under $30 enable the starting point of virtually every project in this collection.
A simple first paper craft project (lucky star origami, tissue paper flower, pressed flower bookmark) is achievable in 20–40 minutes with materials costing under $5. A medium complexity project (iris folding card, paper cutting silhouette, decoupage vase, accordion box) takes 1–3 hours with materials costing $10–25. A complex or repeated project (quilling botanical artwork, hand-bound notebook, paper bead jewelry collection, papier-mâché bowl) takes 3–8 hours across one to two sessions with materials costing $15–40. Every project in this list requires only standard household scissors as the starting tool, with a bone folder, craft knife, and cutting mat as progressively useful additions for the structural and precision-cutting techniques.
Frequently Asked Questions About Easy Paper Craft Ideas for Adults
What paper is best for paper crafts?
Different paper weights and types suit different techniques — matching material to technique is the most important practical paper craft skill. For folding techniques (origami, iris folding, bookbinding): 70–90gsm paper with a clean, consistent fold quality is optimal. For structural forms (boxes, papier-mâché painting, quilling mounts): 200–300gsm card stock provides the rigidity these forms require. For painted paper applications (watercolor art cards, collage): 300gsm cold-press watercolor paper provides the only surface that allows wet application without buckling. For wrapping and layering (decoupage, botanical gift wrap, paper flowers): tissue paper (10–20gsm), washi paper (30–45gsm), and kraft paper (90–120gsm) each suit their specific application. The most common paper craft mistake is using the wrong weight — too heavy for folding (the fold cracks rather than creasing cleanly) or too light for structural application (the form collapses under its own weight or the adhesive).
What tools do you genuinely need to start paper crafting?
The genuine minimum toolkit for the majority of adult paper craft techniques consists of four items: a pair of sharp scissors (kitchen scissors are insufficient — the slight bevelling of non-precision scissors produces torn rather than cut edges on card stock), a bone folder for crisp scored folds, a PVA or craft glue with a fine-tipped applicator for precise adhesion, and a cutting mat with a craft knife for any technique requiring straight or curved cuts. A ruler with a metal edge (not plastic, which can be cut into by a craft knife blade) is the fifth addition and enables every straight-cut technique in the list. Beyond these five items, additional tools (quilling tool, embossing tool, paper trimmer) improve specific techniques but are not prerequisites for beginning.
How do you prevent paper crafts from looking homemade rather than handmade?
The distinction between a paper craft that reads as “homemade” (approximate, functional, slightly apologetic) and one that reads as “handmade” (intentional, precise, design-confident) comes from three specific decisions: material quality (using the correct weight and type of paper for the technique rather than whatever is available), edge and fold precision (a crisp scored fold communicates control; a hand-creased fold communicates approximation), and finishing (a sealed, framed, or packaged paper object reads as complete; an unfinished edge or unsealed surface reads as in-progress). The most impactful single quality improvement available to any paper crafter at any skill level is slowing down for the finishing stage — the fold, the edge trim, the frame, the label — because the finishing stage determines the object’s presentation quality regardless of the construction stage’s technical level.
Which paper crafts make the best handmade gifts?
The paper craft gifts with the most consistent positive recipient response in this list are those combining functional utility with visible craft investment: the hand-bound Japanese stab binding notebook (perceived value consistently exceeds the material cost because recipients associate handmade books with craft expertise), the iris folding card (the geometric interior pattern produces a “how did you make this” response that generic cards cannot), the watercolor art card set (the watercolor paper substrate and painted surface elevate a greeting card to a displayable object), and the accordion paper gift box (the structural sophistication communicates a making skill that simple wrapping does not). The common quality: each of these gifts has a technique-specific detail (the exposed spine thread, the iris pattern, the watercolor wash, the accordion mechanism) that is visible and legible to the recipient as evidence of considered making — not merely paper shaped, but paper crafted.
Can paper crafts be made with children?
Yes — several ideas in this list are inherently appropriate for a collaborative adult-child session: lucky star origami (ages 8 and above with adult guidance for the initial knot), tissue paper flowers (ages 5 and above with adult cutting assistance), paper bead rolling (ages 9 and above), torn magazine collage (ages 6 and above), and pressed flower bookmark making (ages 7 and above). The ideas requiring sharp craft knives (paper cutting, scored box construction) or heat-adjacent materials are for adults only. The most successful adult-child paper craft sessions select a project slightly simpler than the adult’s own target difficulty — the adult’s technical support allows the child to achieve a better result than their skill alone would produce, while the child’s engagement with the making process brings a particular pleasure to the collaborative session that solitary making cannot.
Ready to Start Your Paper Craft Practice?
These 14 ideas move through every dimension of what makes adult paper crafting genuinely satisfying — from the precise dimensional work of paper quilling and iris folding, to the free gestural pleasure of torn magazine collage and wet watercolor wash, to the structural intelligence of hand-bound notebooks and accordion gift boxes, to the magical material transformations of paper bead jewelry and papier-mâché bowls. Starting with the bone folder and a single sheet of 300gsm card stock — before purchasing any specialist materials, before selecting a project, before anything except the specific physical experience of scoring and folding a clean crease — is the beginning that all paper craft knowledge ultimately rests on. Score a fold. Feel whether it is crisp or approximate. Improve the score. Fold again. That specific feedback loop between hand and material is the foundation of every technique in this list, and it costs nothing and takes thirty seconds to discover. Order the bone folder this week, choose the project that made you most want to reach for paper while reading this, and begin. When the quilling coil holds its form, or the iris folding pattern reveals itself when the card is turned over, or the wet watercolor blooms into a color field on the dampened paper surface — the paper will have given you something that no digital medium can: the specific, irreplaceable pleasure of a physical thing made by your own hands.