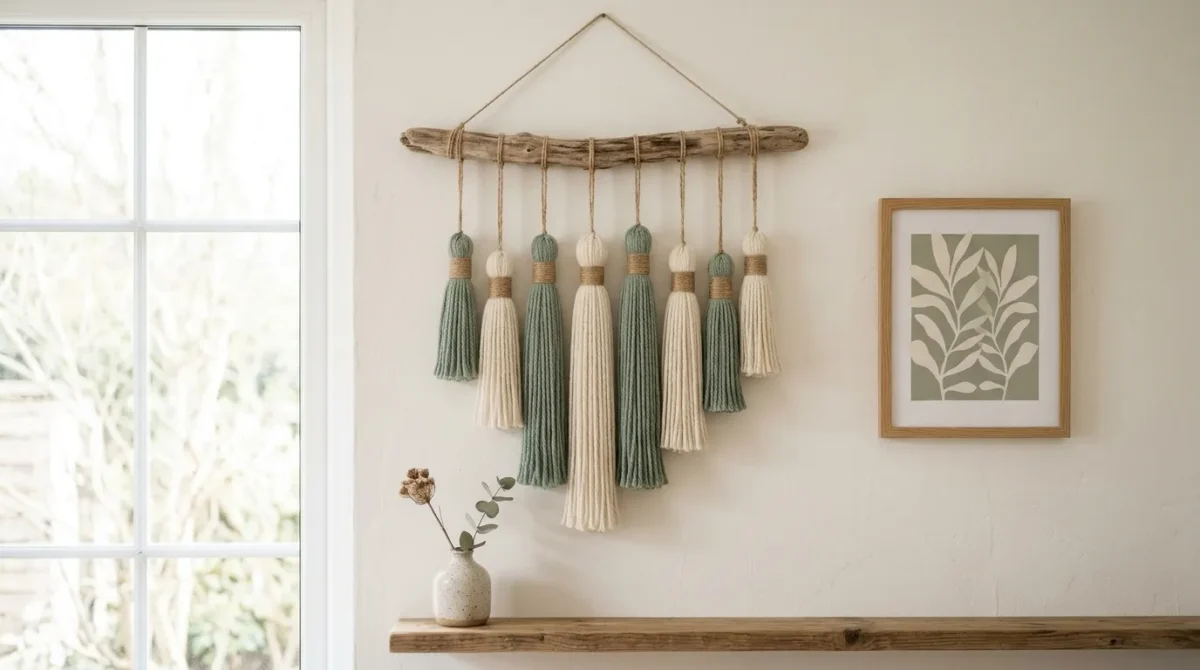
Easy yarn crafts for cozy DIY projects use simple, low-technique methods — finger weaving, pom-pom making, tassel construction, simple wrapping and winding — to transform skeins of yarn into warm, textural home decor and personal accessories without requiring knitting or crochet expertise. This article gives you exactly 13 ideas spanning wall hangings, garlands, pillows, accessories, and seasonal decor so every skill level and every cozy aesthetic finds a project that genuinely works.
There is a particular satisfaction in yarn craft that doesn’t depend on mastering a needle or a hook — the simple act of winding, wrapping, knotting, or looping yarn around your fingers or a found object, watching a shapeless skein become something soft, dimensional, and finished within a single afternoon. These are the crafts that reward patience without demanding skill, and the results carry all the warmth of handmade textile work with none of the technical barrier to entry. Here are 13 ideas worth saving — and making.
Why Easy Yarn Crafts for Cozy DIY Projects Work So Well
Yarn-based craft without needles or hooks has a continuous history across cultures that predates structured fiber techniques — finger weaving and simple wrapping methods appear in archaeological textile records as some of the earliest forms of human fiber manipulation, practiced long before the development of knitting needles (which emerged historically around the 5th century CE) or crochet hooks (a comparatively recent technique, documented from the early 19th century). The contemporary revival of these simple yarn techniques sits within the broader slow-craft and accessible-making movement, but it carries a specific advantage that knitting and crochet do not: the barrier to entry is measured in minutes rather than weeks, making genuine handmade textile results achievable for someone who has never picked up a hook or needle in their life.
The core materials for easy yarn crafts include: chunky and super-bulky weight yarn (the most forgiving and visually impactful weight for hand-manipulated techniques, since thicker yarn produces results faster and shows technique inconsistency less than fine yarn), wool roving (unspun or loosely spun fiber that is even more forgiving than spun yarn for wrapping and pom-pom techniques), cotton and acrylic blends in standard worsted weight (for projects requiring more structure or washability than wool provides), and natural fiber yarns including alpaca, mohair, and undyed wool for projects prioritizing organic texture and warmth over color variety. The tools required are minimal and largely improvised: a fork or a few fingers for tassel and pom-pom making, a piece of cardboard or a dinner plate for pom-pom templates, a wooden dowel or branch for wrapping and hanging projects, and standard household scissors.
The accessibility of these crafts has made them a consistently high-engagement category across craft media — Pinterest’s “easy yarn crafts,” “pom-pom DIY,” and “no-knit yarn projects” categories show sustained strong engagement because the content serves a genuinely underserved audience: people drawn to the warmth and texture of fiber craft who are intimidated by or uninterested in the technical learning curve of knitting and crochet. The cultural driver is consistent with the broader handmade revival — the desire for tactile, slow-made objects in a domestic environment increasingly filled with mass-produced and digital experiences — but these specific techniques widen that movement’s accessibility to anyone willing to spend an afternoon with a skein of yarn.
Small living spaces and modest budgets benefit particularly from easy yarn crafts because the material cost is genuinely low (most projects in this list cost under $20 in yarn) and the finished objects scale easily from a single small accent (a tassel keychain) to a substantial room feature (a full wall hanging) using the same fundamental technique. The honest consideration for beginners: the simplicity of these techniques means the finished object’s quality depends almost entirely on yarn selection and finishing care (trimming, brushing, blocking) rather than on technical execution — spending slightly more on a beautiful chunky yarn and taking the extra ten minutes to trim a pom-pom into a perfect sphere produces a dramatically better result than rushing the same basic technique with budget yarn.
Style at a Glance
| Element | Craft Function | Cozy Edge |
|---|---|---|
| Philosophy | Warmth and texture without technical barriers | Slow-made objects in a fast-made world |
| Materials | Chunky yarn, wool roving, natural fiber | Mohair, alpaca, undyed wool |
| Color Palette | Natural cream, oat, warm neutral | Dusty sage, terracotta, soft blush accent |
1. Finger-Knit Chunky Throw Blanket
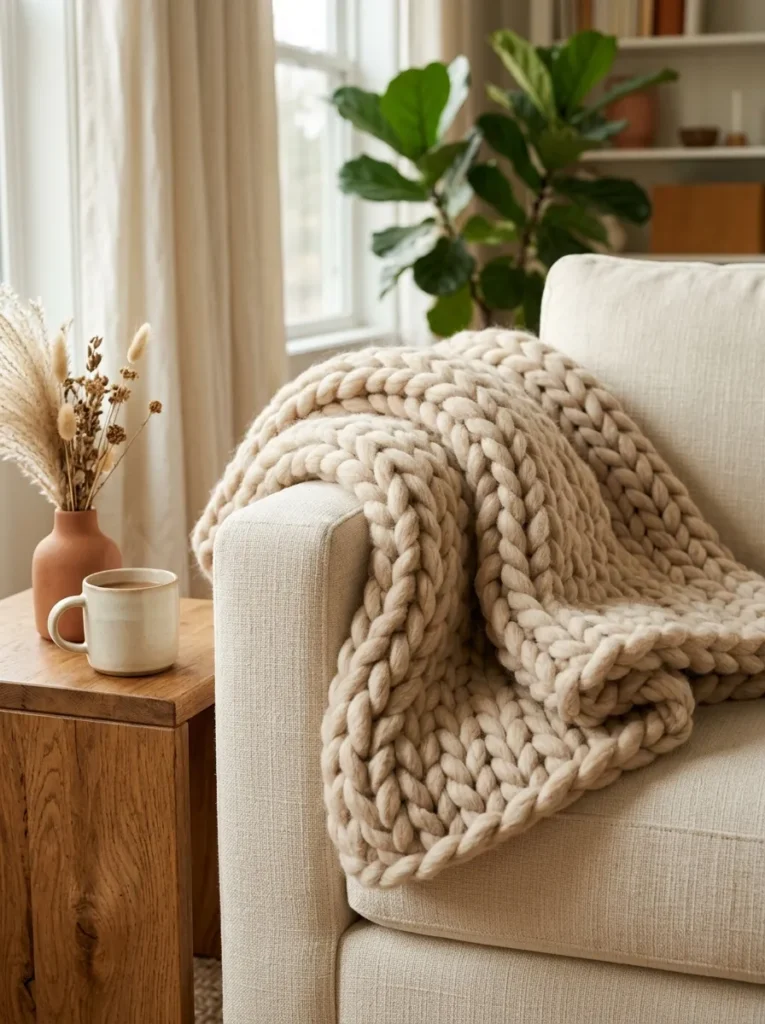
Vibe: The blanket feels immediately tactile — the kind of throw that gets picked up and held before it’s been looked at.
Why it works: Finger knitting requires no tools beyond the maker’s own hands, using a simple loop-over-loop technique worked across the fingers that most people learn in under ten minutes. The technique’s large, exaggerated loop structure means tension inconsistencies that would ruin a needle-knit project simply read as part of the chunky, organic texture in finger knitting — this technical forgiveness is precisely what makes the method ideal for a complete beginner’s first yarn project. Thick wool roving (un-spun or minimally spun fiber, sold specifically for arm and finger knitting) produces a blanket with genuine dimensional loft and visible texture from a relatively small number of total loops, meaning even a beginner can complete a substantial throw blanket in a single afternoon.
How to get it: Use super chunky or jumbo weight wool roving (the thickest commercially available yarn category, typically 800g+ skeins specifically marketed for arm and finger knitting). Cast on by creating a slip knot and a row of loops across your fingers, then work each subsequent row by pulling a new loop through the existing loop on each finger, moving hand over hand across the row. Continue until the blanket reaches the desired length (typically 100–150cm for a throw), then bind off by pulling the final loop through each preceding loop in sequence and securing the last loop with a simple knot.
Quick Win: A single 1kg skein of jumbo wool roving ($35–55) produces a complete lap-sized throw blanket (approximately 80×100cm) in two to three hours of finger knitting — the fastest blanket-scale yarn project achievable by a true beginner.
Shop The Look
| Product |
|---|
| Jumbo wool roving yarn natural oat 1kg |
| Cream linen sofa throw display |
| Ceramic mug simple handmade pottery |
| Dried botanical stem small vase |
| Wood side table natural finish |
2. Pom-Pom Garland for Wall or Mantel Styling
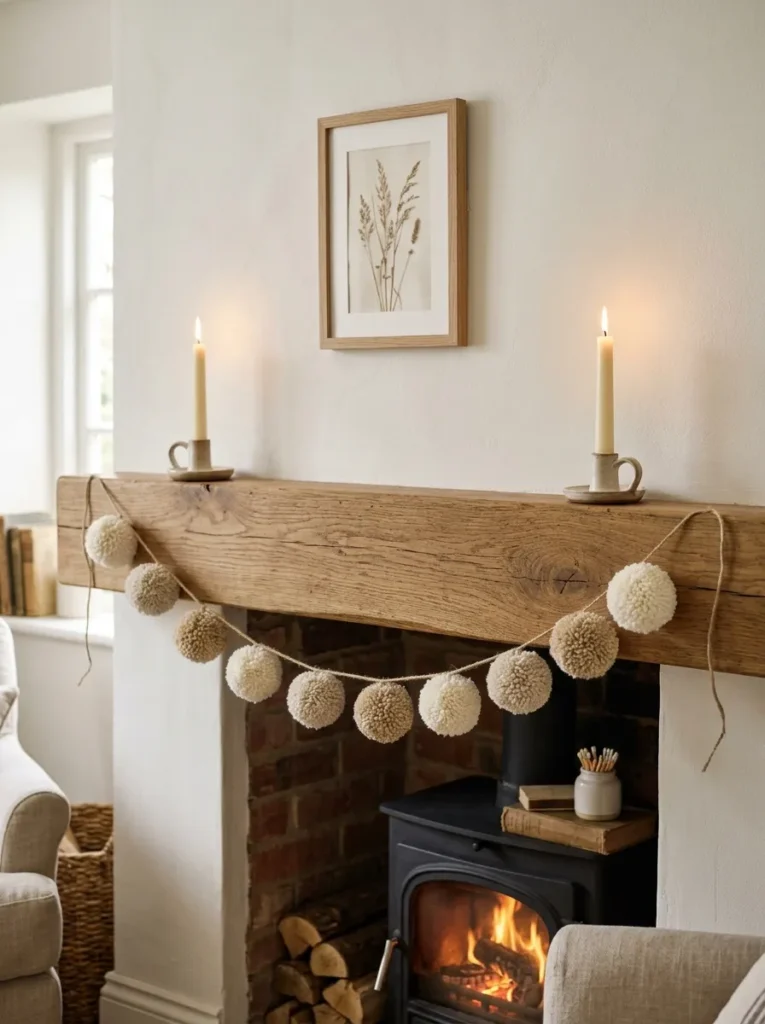
Vibe: The garland feels soft and celebratory — festive without relying on any seasonal color or motif.
Why it works: A pom-pom garland applies the textile craft principle of unit repetition — a single simple technique (the pom-pom) repeated multiple times and strung together produces a composition with far greater visual impact than any individual pom-pom alone, while requiring no skill beyond what is needed to make the first one. Tonal cream, oat, and warm white pom-poms (rather than a multicolor rainbow approach) keep the garland sophisticated enough for year-round mantel or wall display rather than reading as a children’s party decoration, making this the most versatile pom-pom project for an adult home. The technique scales effortlessly — a short eight-pom garland suits a small shelf, while a thirty-pom garland spans a full mantel or doorway.
How to get it: Make each pom-pom by wrapping yarn approximately 80–100 times around a fork or a 5cm cardboard template (more wraps produce a denser, fuller pom-pom). Tie a separate piece of yarn tightly around the center of the wrapped bundle, then cut through all the wrapped loops at both ends of the fork or template. Fluff the resulting pom-pom and trim with sharp scissors into a neat, even sphere — this trimming step is the detail that separates a professional-looking pom-pom from a rough one, and is worth the extra five minutes per pom-pom. Thread a needle with strong cotton twine and string the finished pom-poms by passing the needle directly through the center tie point of each one.
Shop The Look
| Product |
|---|
| Chunky yarn set tonal cream oat warm white |
| Pom-pom maker tool set adjustable |
| Natural cotton twine strong garland |
| Large tapestry needle craft |
| Taper candle holder set simple |
3. Tassel Wall Hanging on a Driftwood Branch
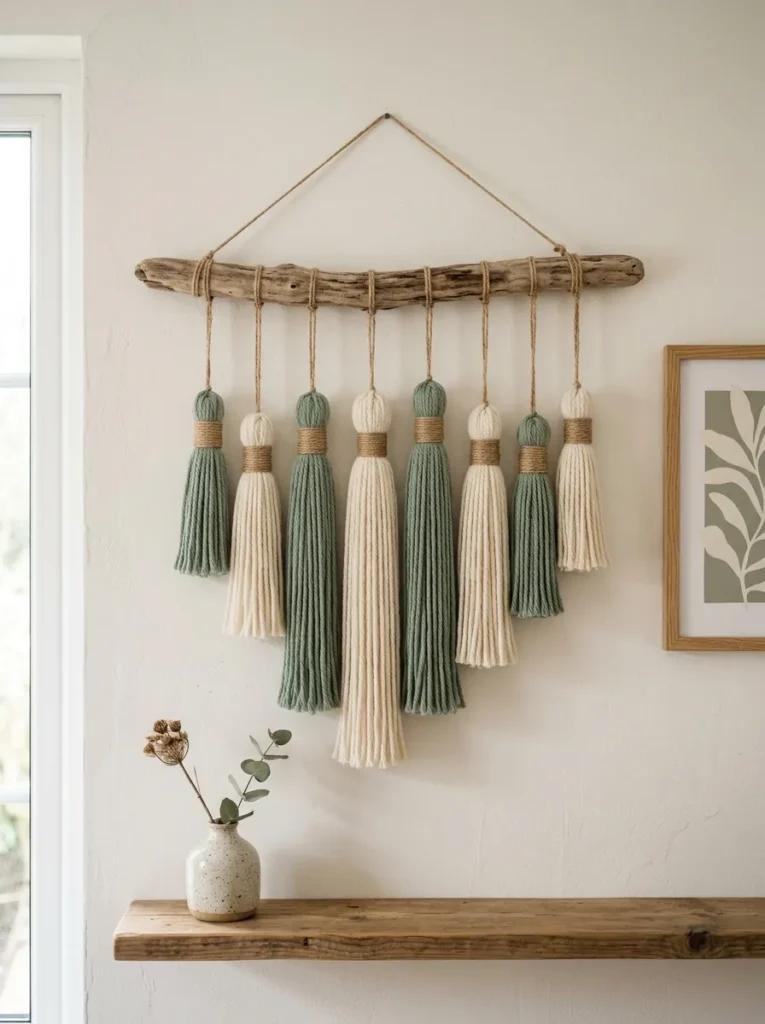
Vibe: The hanging feels warm and minimal simultaneously — proof that a wall hanging doesn’t need complex weaving to read as designed.
Why it works: A tassel wall hanging applies the textile craft principle of bundled simplicity — each tassel is constructed from the same basic wrapping-and-tying technique as a pom-pom, but the bundle remains uncut at one end, producing a cylindrical form with movement and drape rather than a sphere. Arranging multiple tassels of graduated length from a single mounting branch creates the visual rhythm and intentional composition of a more complex woven wall hanging while requiring no loom, no warp threads, and no weaving technique whatsoever — only repeated tassel-making and careful length planning. This makes the tassel wall hanging the most accessible entry point into the wall hanging craft category covered more extensively in dedicated crochet and macramé projects.
How to get it: For each tassel, wrap yarn approximately 40–60 times around a piece of cardboard cut to the desired tassel length (15–25cm, varied across the set). Thread a separate length of yarn under the top of the wrapped bundle and tie tightly, then cut the bundle free from the cardboard at the bottom. Wrap a contrasting or matching yarn tightly around the bundle approximately 2–3cm below the top tie to create the tassel’s “neck,” securing the wrap with a few stitches through the bundle using a tapestry needle. Trim the tassel ends evenly with sharp scissors. Attach each finished tassel to the driftwood branch using a lark’s head knot or simple loop tie.
Shop The Look
| Product |
|---|
| Natural cream DK yarn 100g craft |
| Dusty sage DK yarn 100g craft |
| Driftwood piece natural medium craft |
| Cardboard tassel template set craft |
| Small ceramic vase dried botanical |
4. Wrapped Yarn Letters for Personalized Wall Decor
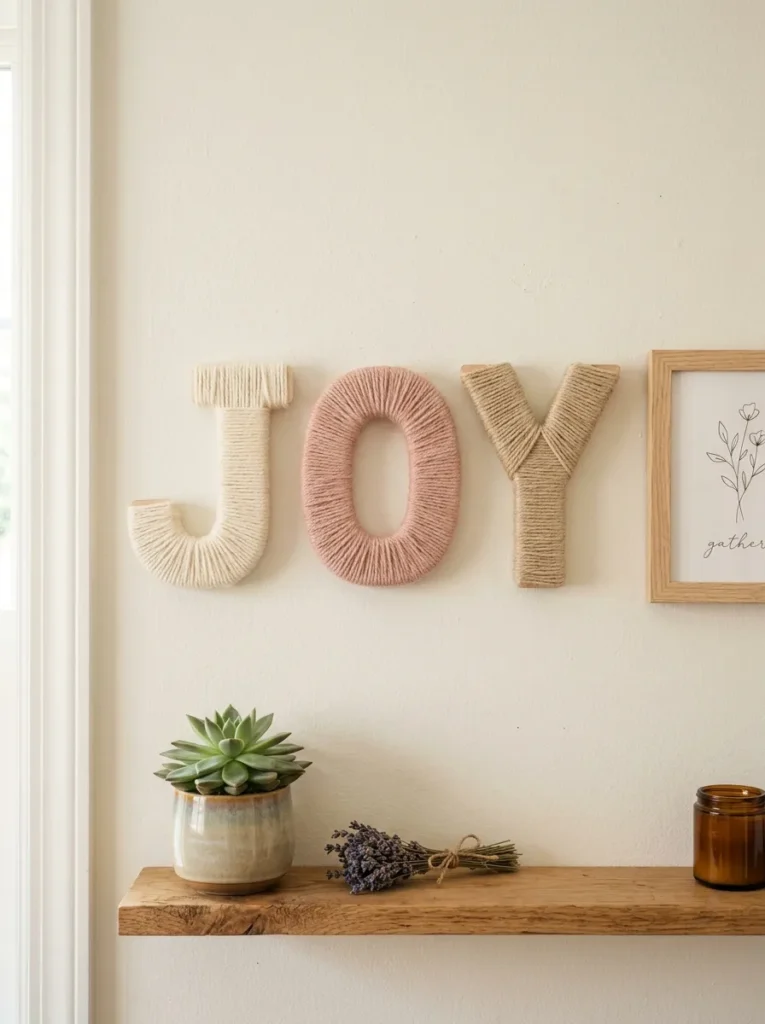
Vibe: The wrapped letters feel warm and intentional — a personalized detail in a material soft enough to invite touching.
Why it works: Yarn-wrapped letters apply the simplest possible yarn technique — winding — to a pre-formed substrate (a wooden craft letter), producing a fully transformed object with zero risk of structural failure since the wood beneath provides all necessary rigidity. This is the most beginner-accessible project in this entire list because the only skill required is winding yarn evenly and securing the ends, with no tying, knotting, or shaping technique to master. Using a different yarn color per letter in a coordinated palette (rather than wrapping every letter identically) creates a more visually interesting composition than a monochrome approach while remaining achievable for a maker working with whatever yarn scraps or small skeins happen to be in their collection.
How to get it: Source unfinished wooden craft letters in the desired initials or word (available at craft stores in sizes from 5 to 30cm). Secure the starting end of the yarn to the back of the letter with a dot of hot glue, then wind the yarn around the letter’s width, working in tight, adjacent rows with no gaps between wraps and no wood visible. Continue around curves and corners by adjusting wrap angle slightly rather than wrapping at a fixed angle throughout — this is the only technique adjustment required for the entire project. Secure the final end with another dot of hot glue on the letter’s back.
Quick Win: A single 50g ball of DK yarn ($3–5) wraps a 15cm wooden letter completely with yarn to spare — a complete personalized letter project achievable for under $10 including the wooden letter itself.
Shop The Look
| Product |
|---|
| Unfinished wooden craft letter set 15cm |
| DK yarn set cream blush oat 50g |
| Hot glue gun mini craft |
| Small wall shelf white narrow |
| Small ceramic plant pot shelf |
5. Woven Wall Hanging on a Simple Cardboard Loom
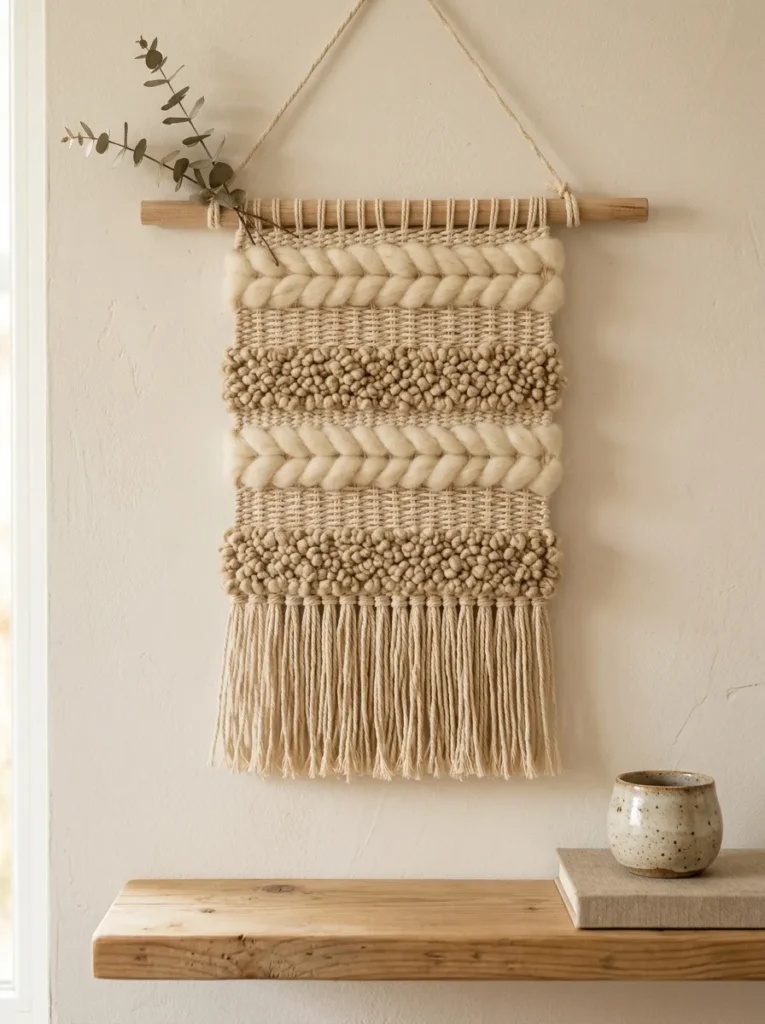
Vibe: The hanging feels textural and accomplished — proof that genuine weaving is approachable without a proper loom.
Why it works: A cardboard loom weaving applies the most fundamental textile structure (the over-under interlacing of warp and weft threads) using a frame so simple it can be constructed from a flattened cardboard box, eliminating the cost and intimidation factor of a purpose-built loom while teaching the exact same technique used on professional equipment. The over-under motion, once learned, requires no further skill development to produce a finished result — visual interest comes entirely from yarn selection (alternating thick and thin, smooth and textured yarns row by row) rather than from weaving complexity, making this project simultaneously simple to execute and genuinely impressive in its finished texture variety.
How to get it: Cut notches at 1cm intervals along the top and bottom edges of a rectangular piece of sturdy cardboard (sized to the intended finished hanging dimensions plus a small margin). Wind a continuous strand of natural cotton string vertically between the top and bottom notches to create the warp — this should be taut but not overstretched. Weave the weft yarn over-under-over-under across the warp threads, packing each row down firmly with a fork before beginning the next row, changing yarn type and color at planned intervals to create the horizontal texture bands. When complete, cut the warp threads from the cardboard’s back, leaving loops at the top to thread onto the dowel and natural fringe at the bottom.
Shop The Look
| Product |
|---|
| Cream chunky wool yarn 100g weaving |
| Natural cotton string warp thread |
| Oat boucle textured yarn 100g |
| Thin wooden dowel 30cm craft |
| Small fork weaving tool tamping |
6. Yarn Wrapped Vases for Soft Textural Centerpieces
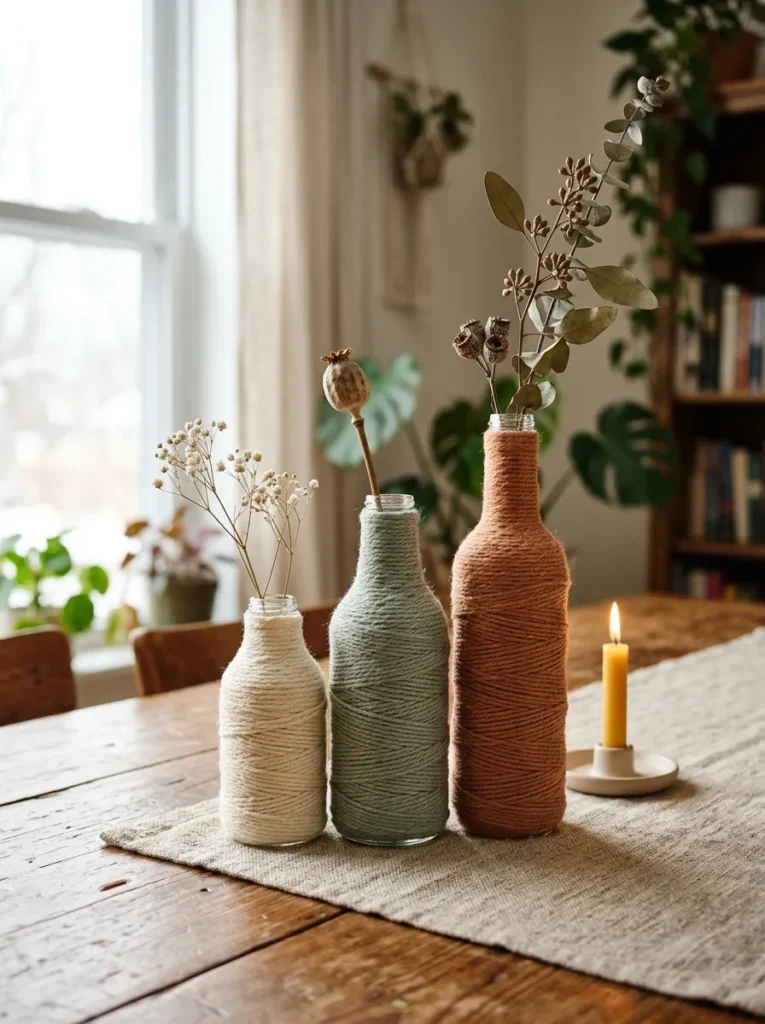
Vibe: The vase grouping feels soft and warm — glass transformed into something that invites touch rather than caution.
Why it works: Yarn-wrapped vases apply the same fundamental winding technique as the wrapped letters (Idea 4) to a different substrate, demonstrating the technique’s versatility — any rigid form with a graspable shape (a bottle, a jar, a simple vase) can be transformed through wrapping into a soft-surfaced object that retains the original form’s function (holding water and flowers) while completely changing its material character. Using three vases in a graduated color sequence (cream to sage to terracotta) applies the design principle of tonal progression covered extensively in textile wall hanging design, here scaled down to a tabletop centerpiece grouping that works as a complete styled moment rather than a single object.
How to get it: Select glass bottles or simple vase forms in varied but related heights (15–30cm range works well for a grouped display). Secure the starting yarn end to the bottle base with a small dot of hot glue or a few wraps tucked under the first full wrap. Wind the yarn around the bottle from base to neck in tight, adjacent rows, maintaining consistent tension throughout — uneven tension causes the wrap to loosen or bunch in sections. At the bottle’s neck, secure the final wrap with a small dot of glue, tucking the cut end beneath the last few wraps for a clean finish. Fill with water and a single dried or fresh stem.
Shop The Look
| Product |
|---|
| Glass bottle vase set varied heights |
| Cream chunky yarn 100g vase wrap |
| Dusty sage chunky yarn 100g vase wrap |
| Terracotta chunky yarn 100g vase wrap |
| Dried botanical stem set single |
7. Yarn Pom-Pom Rug for a Soft Floor Accent
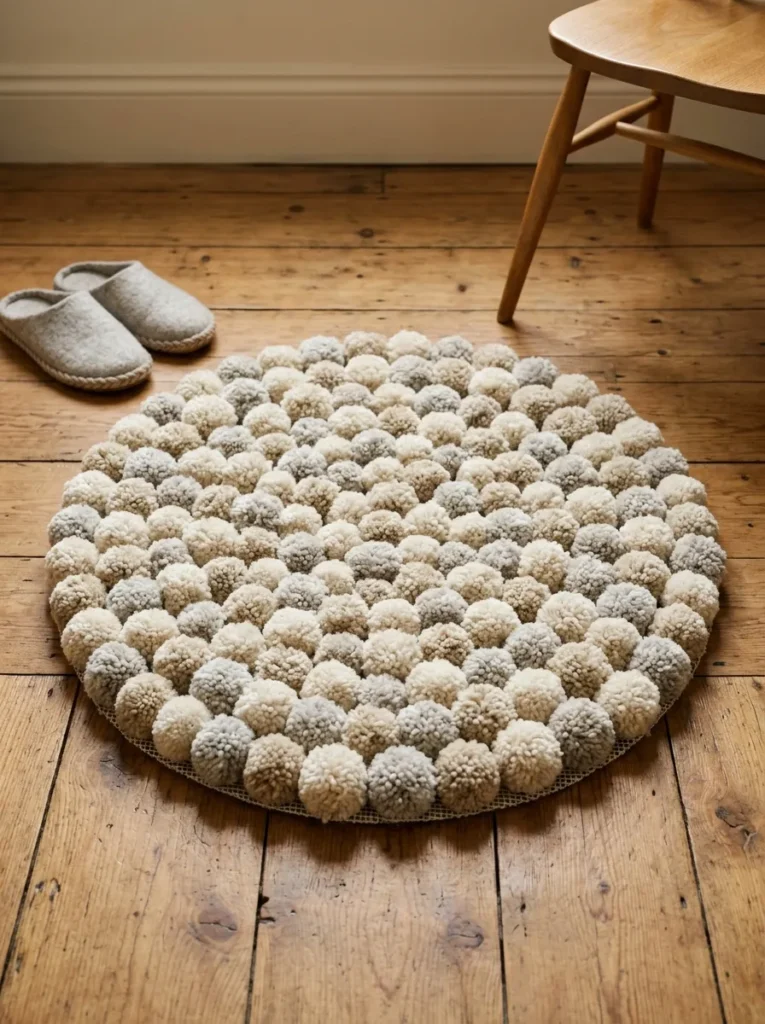
Vibe: The rug feels soft and inviting underfoot — the kind of floor accent that makes a room feel finished and genuinely cozy.
Why it works: A pom-pom rug applies the unit repetition principle of the pom-pom garland (Idea 2) at a much larger scale and density, transforming the same basic technique into a substantial floor textile through sheer quantity rather than any increase in technical complexity. The project requires patience (a full rug typically uses 150–250 individual pom-poms) but no skill escalation beyond the first pom-pom made — this makes it an ideal ongoing project that can be worked in small sessions over several weeks rather than completed in a single sitting, suiting makers who prefer incremental progress on a larger goal. A plastic mesh canvas or net rug backing (sold specifically for this purpose, or a repurposed plastic mesh bag) provides the structural base that holds the finished pom-poms in their rug formation.
How to get it: Make 150–250 pom-poms in the chosen tonal palette using the fork or template method described in Idea 2, varying the size slightly (4–6cm finished diameter) for visual texture variety. Cut a circular or rectangular piece of rug-backing mesh (plastic canvas mesh, sold in craft stores, or a non-slip rug grid mesh) to the desired finished rug size. Tie each pom-pom to the mesh by threading the pom-pom’s center tie-off string through a mesh hole and knotting securely on the underside, working in a dense, even pattern across the full mesh surface with no gaps showing through.
Shop The Look
| Product |
|---|
| Chunky yarn set tonal cream oat gray 5x100g |
| Pom-pom maker tool set multiple sizes |
| Plastic rug mesh backing round 80cm |
| Tapestry needle large craft |
| Simple wool slipper pair home |
8. Yarn-Wrapped Macrame-Style Plant Hanger Alternative
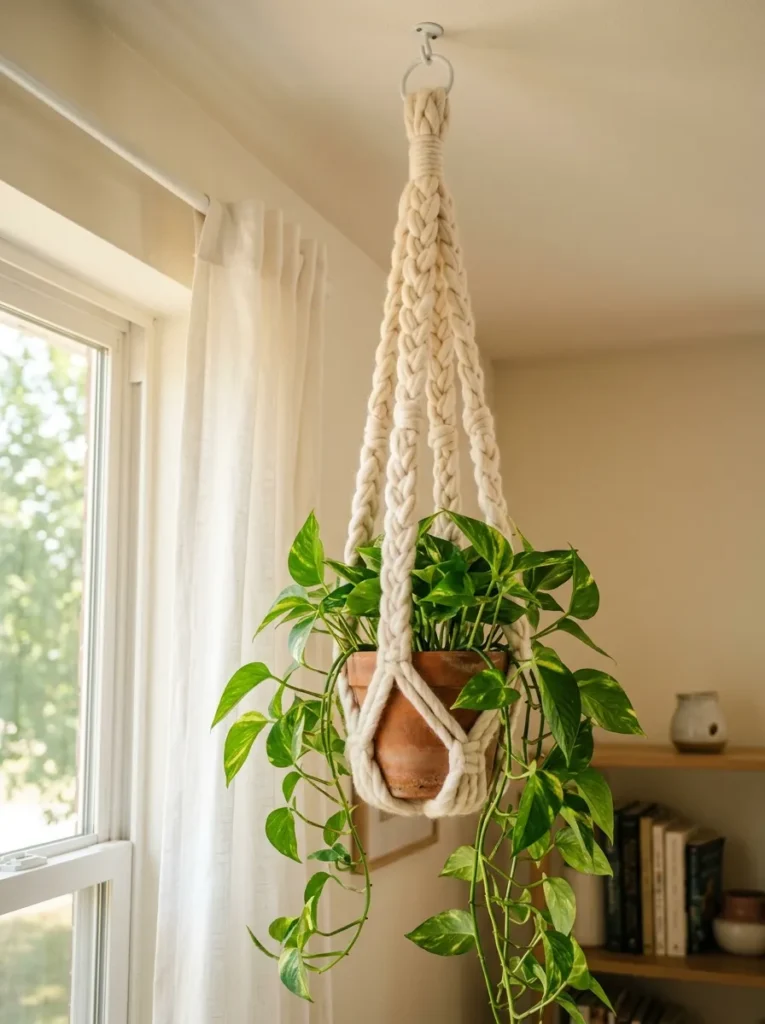
Vibe: The hanger feels soft and gentle — a plant hanger without the slightly severe geometry of knotted rope macramé.
Why it works: A yarn-wrapped plant hanger applies basic three- or four-strand braiding (a technique most people already know from braiding hair or simple craft cord) rather than the structured knot sequences of traditional macramé, producing a comparable hanging plant cradle through a technique that requires zero new learning for the vast majority of adult makers. Using chunky yarn rather than the cord or rope of traditional macramé softens the entire visual register of the hanger — the result reads as fuzzy and warm rather than structured and graphic, which suits a wider range of interior styles, including those where traditional macramé’s strong textural geometry might feel too pronounced.
How to get it: Cut four lengths of chunky yarn, each approximately 200cm long (this generous length accounts for the braiding take-up and the hanging drop). Fold all four strands in half and tie the folded point with a separate length of yarn to create a hanging loop, producing eight working strands below the loop. Divide the eight strands into four pairs and braid each pair together for approximately 15cm. Gather all four braided pairs at the 15cm point and tie together with another yarn wrap — this creates the first “leg” division. Repeat the same braid-and-gather sequence to create the pot cradle’s second tier, then gather all strands at the base and tie off, leaving enough length below for the pot to sit securely in the cradle.
Shop The Look
| Product |
|---|
| Chunky cream yarn 200g plant hanger |
| Terracotta planter pot small drainage |
| Trailing pothos plant small indoor |
| Ceiling hook hanging plant mount |
| Simple white sheer curtain panel |
9. Yarn Bombed Mason Jar Lanterns for Warm Ambient Light
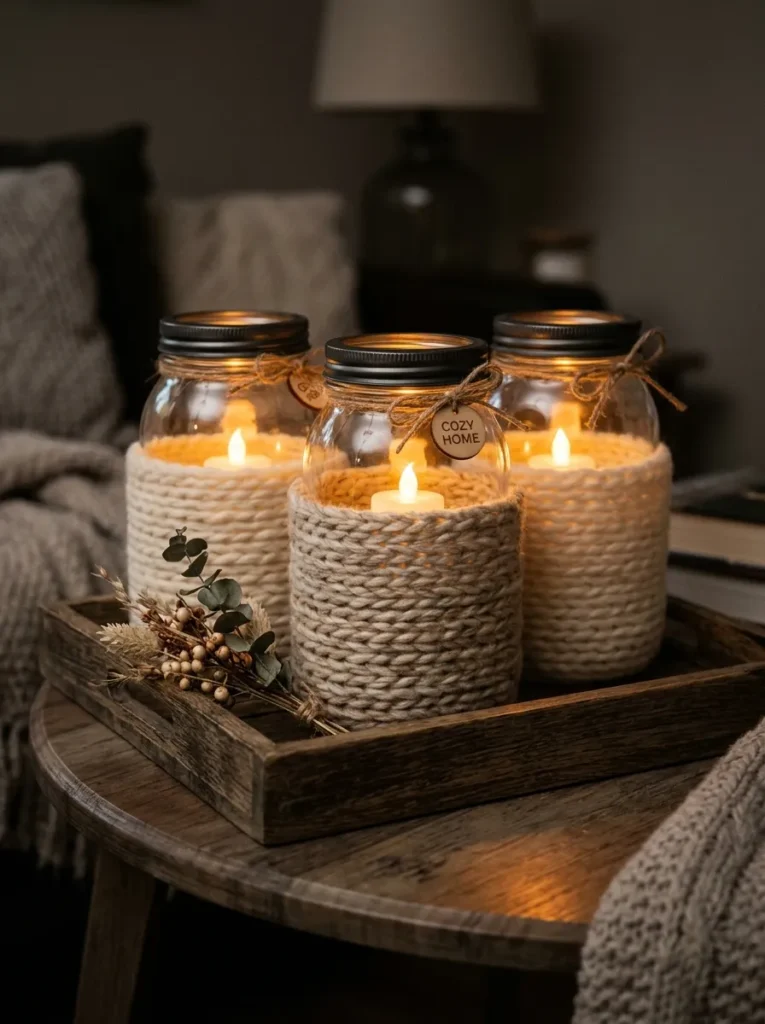
Vibe: The lanterns feel warm and gently glowing — yarn craft that does double duty as functional evening lighting.
Why it works: Yarn-wrapped mason jar lanterns apply the wrapping technique from Ideas 4 and 6 specifically to a light-diffusing application, exploiting the natural property of yarn to soften and warm any light source that shines through or around it. Leaving the upper third of the jar unwrapped (clear glass) allows the battery tea light’s direct glow to be visible from above, while the wrapped lower section diffuses the same light source into a softer, textural glow at the jar’s base — this combination of direct and diffused light from a single source creates more visual interest than either fully wrapping or fully exposing the jar would achieve alone. Battery-operated tea lights (rather than real flame) make this project safe for use with yarn in close proximity to the light source, which would not be appropriate with an open flame.
How to get it: Secure the yarn’s starting end to the jar base with a small dot of hot glue, positioned so the glue dot will be hidden beneath the wrap. Wind the yarn around the jar in tight, even rows working upward, stopping at approximately two-thirds of the jar’s total height. Secure the final wrap with another small dot of glue, applied carefully to avoid contact with the jar’s interior or the light source. Insert a battery-operated tea light or LED candle into the jar — never use a real flame candle inside a yarn-wrapped vessel, as the fire risk is significant.
Shop The Look
| Product |
|---|
| Mason jar set wide mouth glass |
| Chunky cream yarn 100g lantern wrap |
| Chunky oat yarn 100g lantern wrap |
| Battery operated tea light LED set |
| Wooden tray small display natural |
10. Simple Yarn Loop Keychain or Bag Tassel Accessory
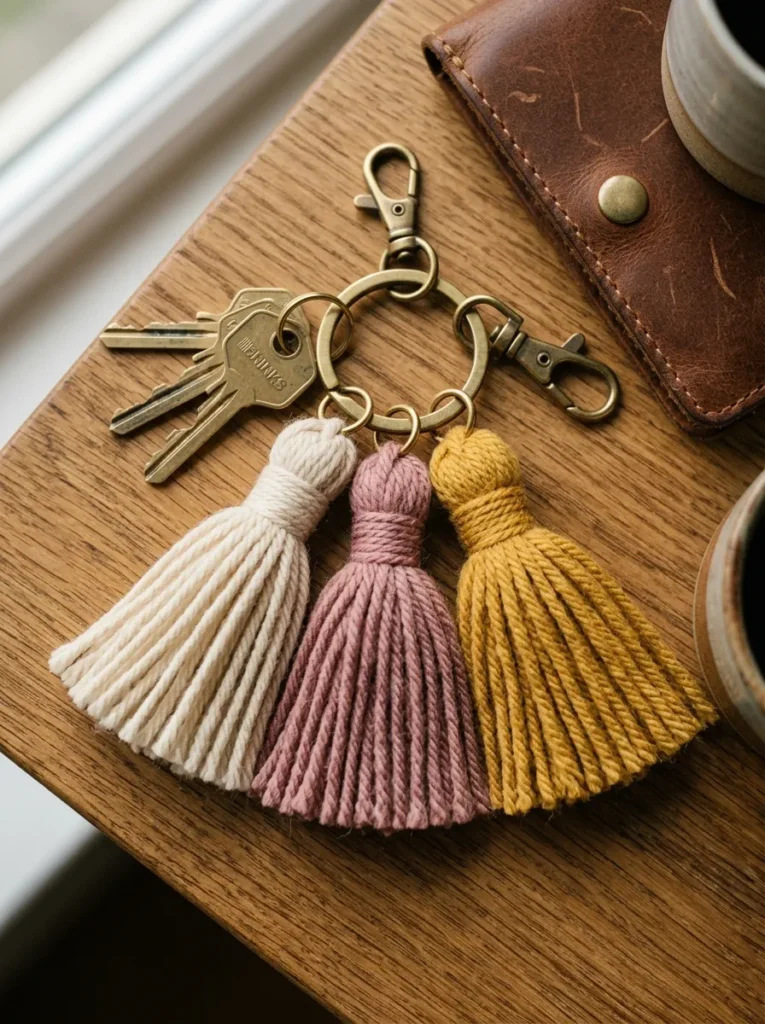
Vibe: The keychains feel small and personal — a tiny version of a larger craft technique that makes an ideal first project or quick gift.
Why it works: A yarn tassel keychain applies the exact tassel-making technique from Idea 3 at a dramatically reduced scale, making it the fastest complete project in this entire list — a single tassel keychain can be made start to finish in under ten minutes once the basic technique is understood. This scale reduction also makes the project the most cost-efficient use of yarn scraps, since a small tassel requires only a few meters of yarn rather than a full skein, allowing leftover yarn from larger projects (Ideas 1, 3, 5, 7) to be used productively rather than discarded. The small scale and quick completion time make tassel keychains the ideal practice project for absolute beginners before attempting the larger wall hanging or rug projects in this list.
How to get it: Wrap yarn approximately 20–25 times around two or three fingers (rather than a cardboard template, for this small scale) to create the tassel bundle. Tie a separate length of yarn tightly around the top of the wrapped bundle, then slide the bundle off your fingers and cut through the loops at the bottom. Wrap a contrasting yarn around the bundle’s neck approximately 1cm below the top tie, securing with a few stitches. Trim the tassel ends evenly. Attach a brass jump ring through the top loop and connect to a key ring using needle-nose pliers to open and close the jump ring securely.
Quick Win: A small skein of any leftover DK yarn ($0, using craft scraps) plus a $2–3 jump ring and key ring set produces a complete tassel keychain in under ten minutes — the fastest and lowest-cost project in this entire list, ideal for using up yarn remnants from any other project.
Shop The Look
| Product |
|---|
| DK yarn scrap set assorted colors |
| Brass jump ring set jewelry craft |
| Key ring set small brass |
| Needle nose pliers jewelry craft |
| Small leather wallet accessory |
11. Woven Yarn Friendship Bracelet Style Wrap for Adult Wrist Stack
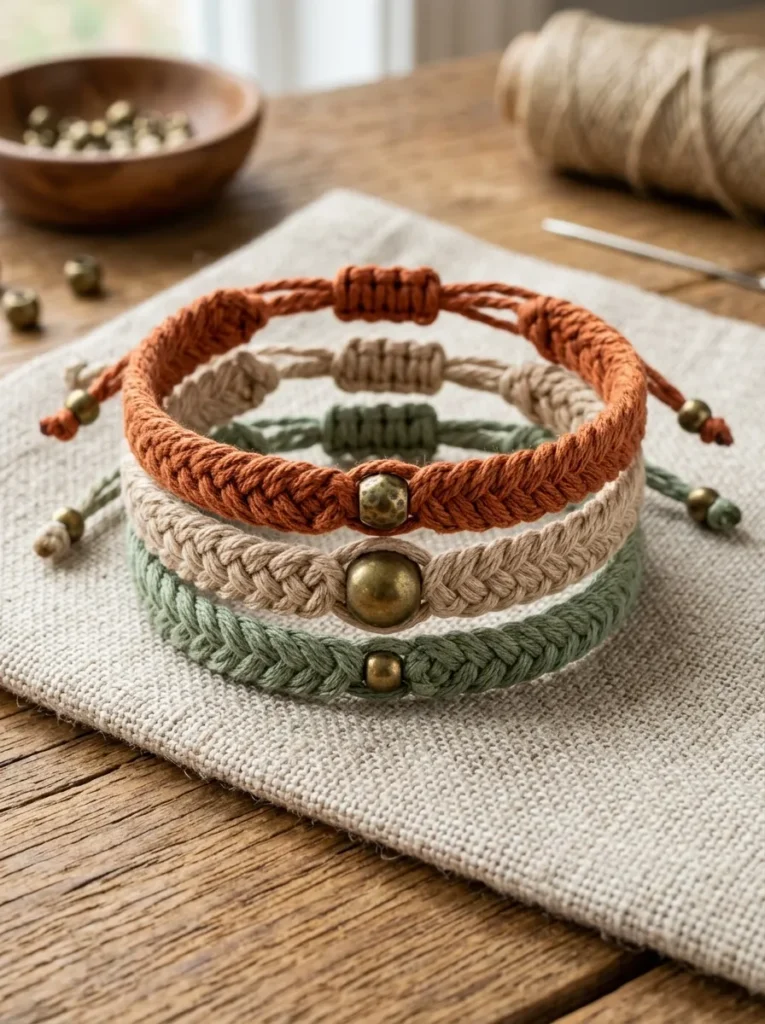
Vibe: The bracelets feel refined despite their simple technique — proof that braiding, executed carefully, produces genuinely wearable adult jewelry.
Why it works: A woven yarn wrap bracelet applies basic three-strand braiding (the same technique used in the plant hanger, Idea 8) at jewelry scale, using fine cotton-blend yarn rather than chunky wool for a refined, wearable result. The sliding knot closure (a simple adjustable knot technique using two ends of cord passed through each other and tied) eliminates the need for any clasp hardware, making the entire bracelet achievable using only yarn, a small brass bead, and basic braiding and knotting skill. Coordinating three bracelets in related warm tones (rather than a single bracelet) creates the layered “wrist stack” aesthetic that has dominated jewelry styling since approximately 2018, achievable here at a fraction of the cost of equivalent purchased jewelry.
How to get it: Cut three lengths of fine cotton-blend yarn, each approximately 50cm. Knot the three strands together at one end and braid tightly for the desired bracelet length (15–18cm for most adult wrists), maintaining even tension throughout for a neat, uniform braid. Thread a small brass bead onto one or more strands at a planned point in the braid for a decorative accent, securing it in place by braiding around it. Finish both ends by tying a sliding knot — wrap one end’s strands around the other end’s strands in a loose overhand knot, then pull tight, creating an adjustable closure that slides to fit different wrist sizes.
Shop The Look
| Product |
|---|
| Fine cotton blend yarn terracotta oat sage |
| Small brass bead set jewelry craft |
| Jewelry scissors small precision craft |
| Linen fabric small display piece |
| Craft beading mat work surface |
12. Chunky Yarn Wreath for a Soft Seasonal Door Accent
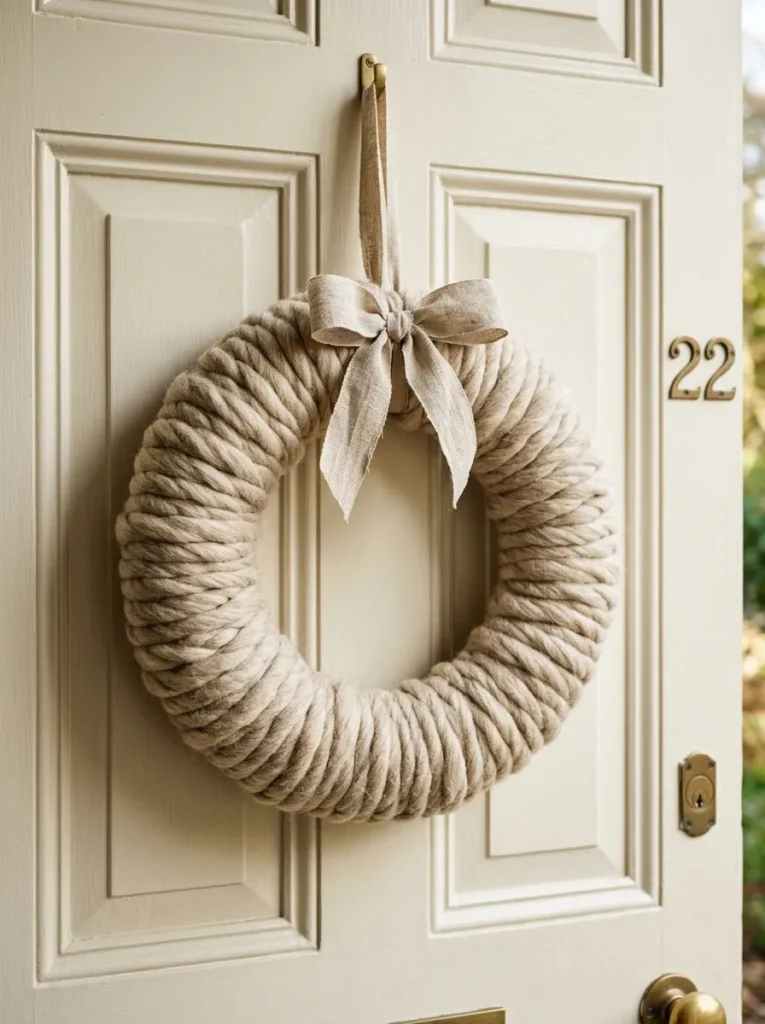
Vibe: The wreath feels soft and warm — a door decoration that swaps the traditional foliage form for pure tactile texture.
Why it works: A yarn-wrapped wreath applies the same fundamental winding technique used throughout this list (Ideas 4, 6, 9) to the traditional wreath form, replacing the typical foliage or floral wreath with one built entirely from wrapped fiber texture. A foam wreath ring substrate (the same base used in traditional floral wreath-making) provides the structural circular form, and the thick wool roving wraps around it with enough give to follow the ring’s curve smoothly while building genuine dimensional thickness across the full circumference. This project requires no seasonal color commitment — unlike a traditional autumn or winter wreath, a natural-toned yarn wreath functions as a year-round door or wall accent that doesn’t need to be changed or stored seasonally.
How to get it: Working in continuous sections around the ring, wrap the chunky wool roving tightly and evenly around the foam ring, overlapping each pass slightly to ensure no foam shows through. Continue around the full circumference, securing the starting and ending points by tucking the yarn ends into the wrapped layer and securing with a small dot of hot glue if needed. For a fuller, more dimensional result, wrap a second layer over the first in a slightly looser pattern, creating visual depth and movement across the wreath’s surface. Tie a wide linen ribbon into a simple bow at the top for hanging, securing with a U-pin pushed through the ribbon into the foam.
Shop The Look
| Product |
|---|
| Foam wreath ring 35cm craft |
| Chunky oat wool roving 500g wreath |
| Wide linen ribbon natural craft |
| U-pin set foam craft wreath |
| Hot glue gun mini craft tool |
13. Yarn Wrapped Coasters for Functional Tabletop Texture
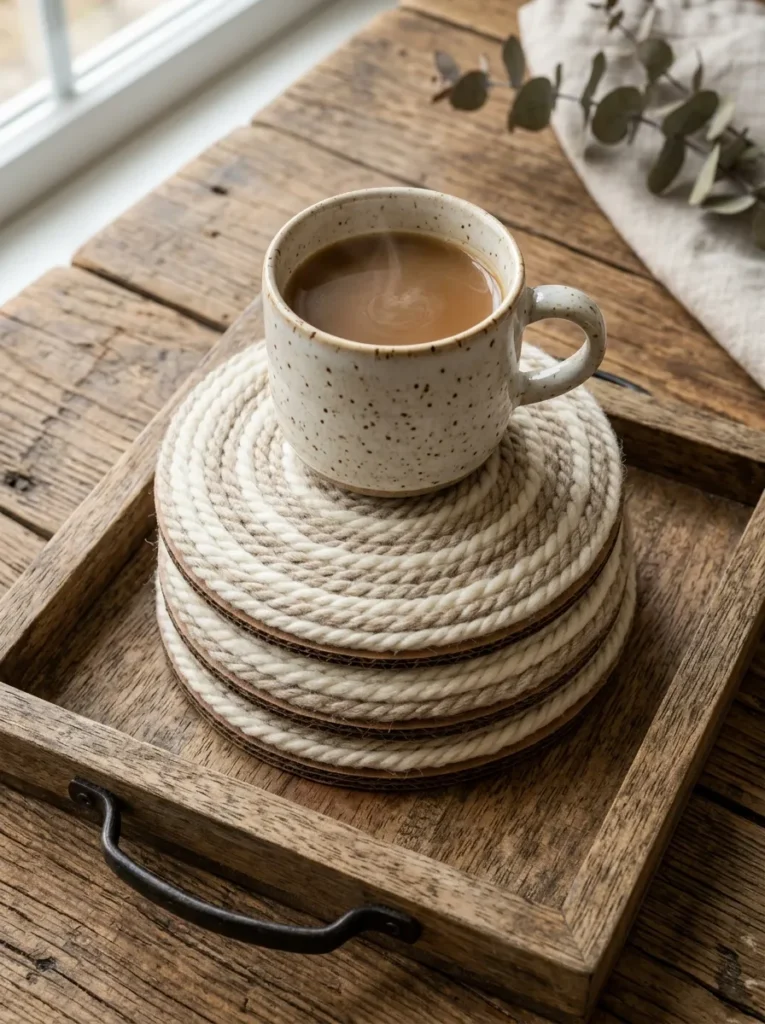
Vibe: The coasters feel like small paintings — a functional object elevated through a deceptively simple technique.
Why it works: Yarn-wrapped spiral coasters apply a coiling technique (winding yarn around a central point in expanding concentric rings, similar to the construction of a coiled rope basket) to a flat cardboard substrate, producing a dense, mug-supporting surface from simple repetitive winding. The concentric ring structure naturally creates color-banded pattern when alternating yarn colors at planned intervals, requiring no design skill beyond deciding where each color change occurs — the technique itself produces the pattern. This project demonstrates the most structurally functional application of basic yarn wrapping in this list, since the finished coaster must actually support the weight and heat of a filled mug, making the wrapping density and securing technique more consequential than in purely decorative wrapped objects.
How to get it: Cut a circular cardboard base approximately 10cm diameter with a small starting slit cut from the edge to the center. Insert the yarn end into the slit to anchor it, then wind the yarn in a tight spiral starting from the center, working outward in concentric rings, with each ring’s yarn packed snugly against the previous ring with no cardboard visible between rings. Change yarn color at planned intervals by cutting the working yarn, tucking the end under the last completed ring, and beginning the new color by tucking its starting end under the same point. Secure the final outer ring’s end with a small dot of fabric glue on the coaster’s underside, then seal the entire coaster surface with a thin coat of Mod Podge for moisture resistance and durability.
Shop The Look
| Product |
|---|
| Chunky cream yarn 100g coaster craft |
| Chunky oat yarn 100g coaster craft |
| Cardboard circle disc set 10cm craft |
| Mod Podge sealer matte craft |
| Wooden display tray small coasters |
How to Start Your Easy Yarn Craft Practice
The single best first move before beginning any project in this list is making a single small tassel or pom-pom using whatever yarn is already available at home — even a tangled remnant from a closet or a craft drawer. This first quick test object (achievable in under fifteen minutes) reveals the two most important pieces of information for every subsequent project: how the chosen yarn’s thickness and fiber content behaves when wrapped and tied (thin yarn requires more wraps for the same finished bulk; fuzzy mohair-type yarns are harder to trim cleanly than smooth cotton), and whether the maker’s natural tension is loose or tight (which determines whether future projects need slightly more or fewer wraps to achieve the desired finished density). No amount of careful instruction-reading substitutes for this physical, hands-on information.
The most common mistake beginners make across all of these projects is rushing the finishing step — trimming a pom-pom unevenly, leaving a tassel’s ends ragged rather than trimmed flush, or failing to secure a wrapped object’s starting and ending points firmly. The technique itself (winding, wrapping, simple braiding) is genuinely simple and forgiving, but the finishing details (a precisely trimmed pom-pom sphere, a cleanly secured tassel neck, an evenly tensioned wrap with no visible substrate showing through) are what distinguish a professional-looking finished object from an obviously amateur one. Budgeting an extra five to ten minutes per object specifically for finishing — after the main technique is complete — produces a dramatically better result than treating finishing as an afterthought.
Three specific items under $50 that enable nearly every project in this list: a 500g skein of chunky natural-toned wool roving ($25–35, sufficient for a wreath, several tassels, or a small pom-pom collection); a multi-size pom-pom maker tool set ($8–14, producing more consistent results than improvised cardboard templates for repeated pom-pom projects); and a pack of large tapestry needles with a hot glue gun ($10–18 combined, covering the finishing requirements of weaving, securing wraps, and attaching tassels across virtually every project in this list).
A small project (a single tassel keychain, a pair of yarn-wrapped coasters) takes 10–30 minutes including finishing. A medium project (a pom-pom garland, a small woven wall hanging, a plant hanger) takes one to two hours across a single session. A large project (a finger-knit blanket, a full pom-pom rug, a chunky yarn wreath) takes three to six hours, often spread across two or three sessions for the most enjoyable working rhythm. Materials for small projects cost under $10; medium projects $15–35; large projects $25–60. Every project in this list requires no specialist tools beyond basic household items and craft scissors, making the entire category accessible to a first-time crafter working entirely from a kitchen table.
Frequently Asked Questions About Easy Yarn Crafts
What is the best yarn weight for beginner yarn crafts?
Chunky or super bulky weight yarn (the thickest commercially available categories, sometimes labeled weight 5 or weight 6 on standard yarn weight charts) is the best choice for nearly every beginner yarn craft because thicker yarn produces visible, satisfying results from fewer total wraps or loops, making projects faster to complete and more forgiving of tension inconsistencies. Finer yarn (DK or worsted weight) is appropriate for smaller-scale projects where bulk would be inappropriate — keychains, fine bracelets, and detailed coaster work — but requires more total material and more careful, even technique to produce a comparable finished result to a chunky-yarn project. Beginners should avoid very fine yarns (fingering or lace weight) for any of the techniques in this list, as the fine gauge makes tension inconsistency highly visible and the projects take significantly longer to complete.
How do you trim a pom-pom into a neat, even sphere?
Trimming a pom-pom into a clean sphere requires holding the pom-pom firmly by its tie point and using sharp, sturdy craft or fabric scissors (not paper scissors, which are too light for dense yarn) to trim in small, controlled cuts rather than large chops. Work around the pom-pom systematically, rotating it in your hand and trimming a small amount from each section in sequence, checking the overall shape frequently by holding the pom-pom at arm’s length rather than trimming while looking at it closely (close-range trimming makes it difficult to assess the overall sphere shape accurately). Trim slightly more from any section that appears longer than its neighbors, working gradually toward an even sphere rather than attempting to achieve perfection in a single pass. A pom-pom maker tool with a built-in trimming guide simplifies this process significantly for beginners.
Can these yarn crafts be made with synthetic or acrylic yarn instead of wool?
Yes — acrylic and acrylic-blend yarns work well for the majority of projects in this list and offer specific advantages for certain applications: acrylic is more affordable than wool at comparable thickness, machine washable (relevant for the throw blanket, Idea 1, and any project that may need regular cleaning), and available in a wider range of consistent, predictable colors than natural wool. The primary disadvantage of acrylic is its lower natural loft and warmth compared to wool — projects prioritizing maximum textural dimension (the pom-pom rug, the wreath) benefit from wool’s natural crimp and bounce, which acrylic yarn does not replicate as effectively. For budget-conscious crafters or households with wool allergies, acrylic chunky yarn produces genuinely successful results across every project in this list with only minor differences in final texture and drape.
How much yarn do I need for a finger-knit blanket?
A standard lap-sized throw blanket (approximately 80×100cm) using jumbo or super chunky weight wool roving typically requires 1–1.5kg of yarn, depending on the specific wrap density and finished loop size of the maker’s technique. A full bed-sized throw (approximately 150×200cm) requires proportionally more, typically 3–4kg of jumbo yarn. Because finger knitting produces large, visible loops, the yarn consumption is significantly higher per square centimeter of finished fabric than standard needle knitting at a comparable weight — this is a normal characteristic of the technique rather than an indication of inefficient material use, and is the trade-off for the technique’s speed and beginner accessibility.
What can I do with leftover yarn scraps from these projects?
Leftover yarn scraps from any project in this list are ideal for the smallest-scale projects in this collection — tassel keychains (Idea 10), wrapped coasters (Idea 13), and small pom-poms for a garland (Idea 2) all use minimal yarn quantities and benefit from using up remnant lengths rather than requiring a fresh skein purchase. Scraps too short for wrapping or winding techniques can be saved for tying off and securing other projects (the small lengths needed to tie pom-pom centers or secure tassel necks), meaning very little yarn from this category of craft project goes to genuine waste. Maintaining a labeled scrap basket organized by color family makes future small-scale projects faster to plan, since the available material is visible and sorted rather than tangled in a single mixed bag.
Ready to Start Your Easy Yarn Craft Projects?
These 13 ideas move through every dimension of what makes simple yarn craft genuinely satisfying and genuinely accessible — from the immediate tactile reward of a finger-knit blanket completed in a single afternoon, to the patient, meditative repetition of a full pom-pom rug built over several sessions, to the small-scale precision of a tassel keychain that takes ten minutes and uses nothing but scraps, to the functional elegance of wrapped coasters that put the technique to genuine daily use. Beginning with that first small test tassel or pom-pom — made from whatever yarn is already in the house, before any purchase or planning — is not a delay before the real craft begins. It is the craft beginning in its truest form, because the information that single small object gives you about your yarn, your tension, and your patience is the foundation every larger project in this list depends on. Find a scrap of yarn this evening, wrap it around three fingers, tie it off, and trim it — the easy yarn craft practice has already started, and everything that follows from here is simply doing the same simple thing again, a little more deliberately, until something genuinely cozy takes shape in your hands.